Extra Tips
For some species, the markers might be harder to place. Here are some extra tips that should help you with the more difficult species of bird.
Point 1 Extra Tips
Potentially difficult species include: ducks, woodpeckers, some pheasants and parrots.
This point can be hard to find on species where the tip of the bill is blunt or rounded, so remember:
- The point will always be on the centre line of the bill
- The point will be where the left and right edges meet
- The point will always be in the lowest possible position
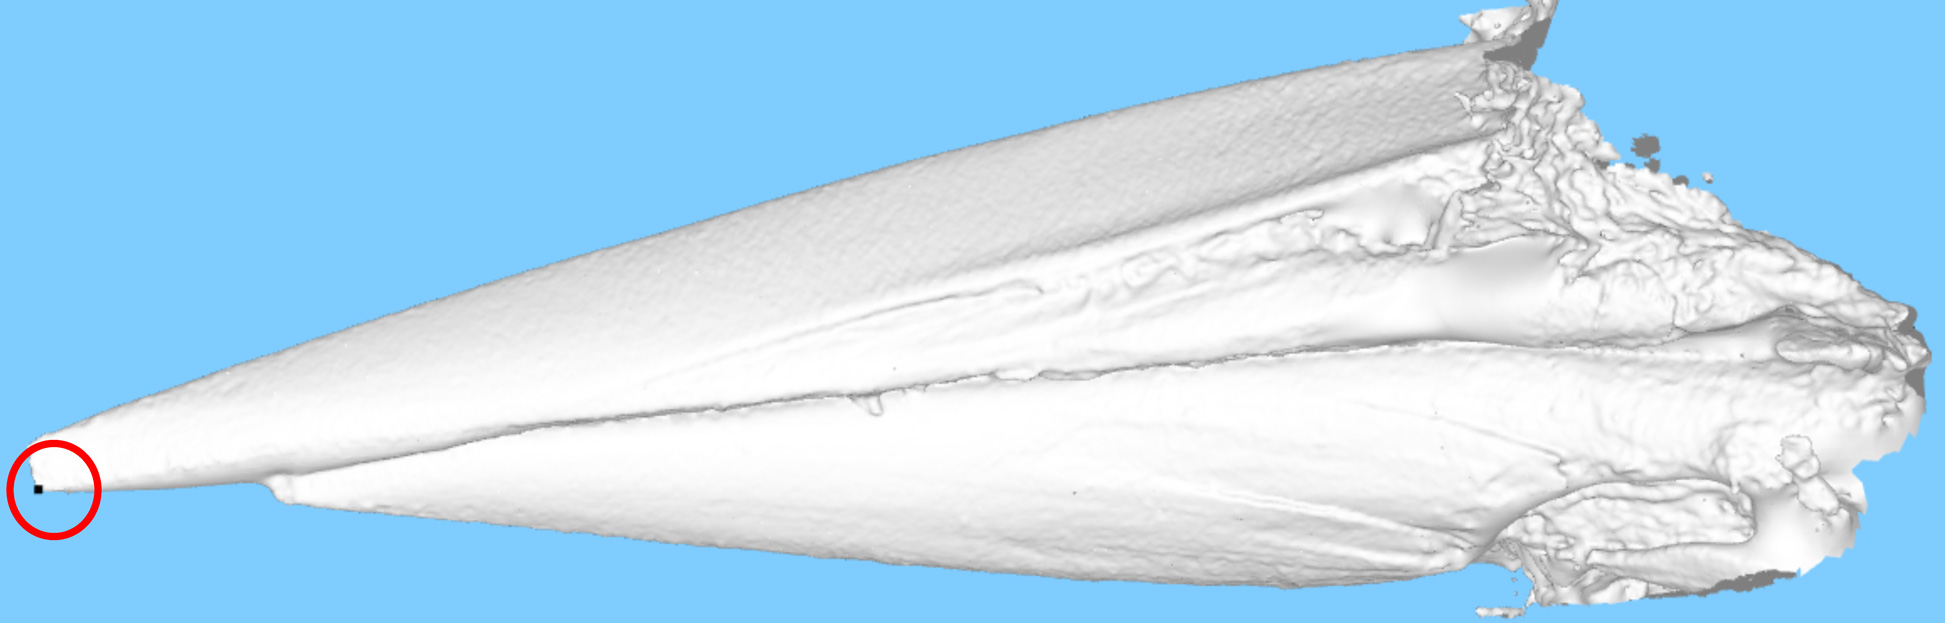
Here are some examples of Point 1 on a Northern Shoveller Duck (Anas clypeata).
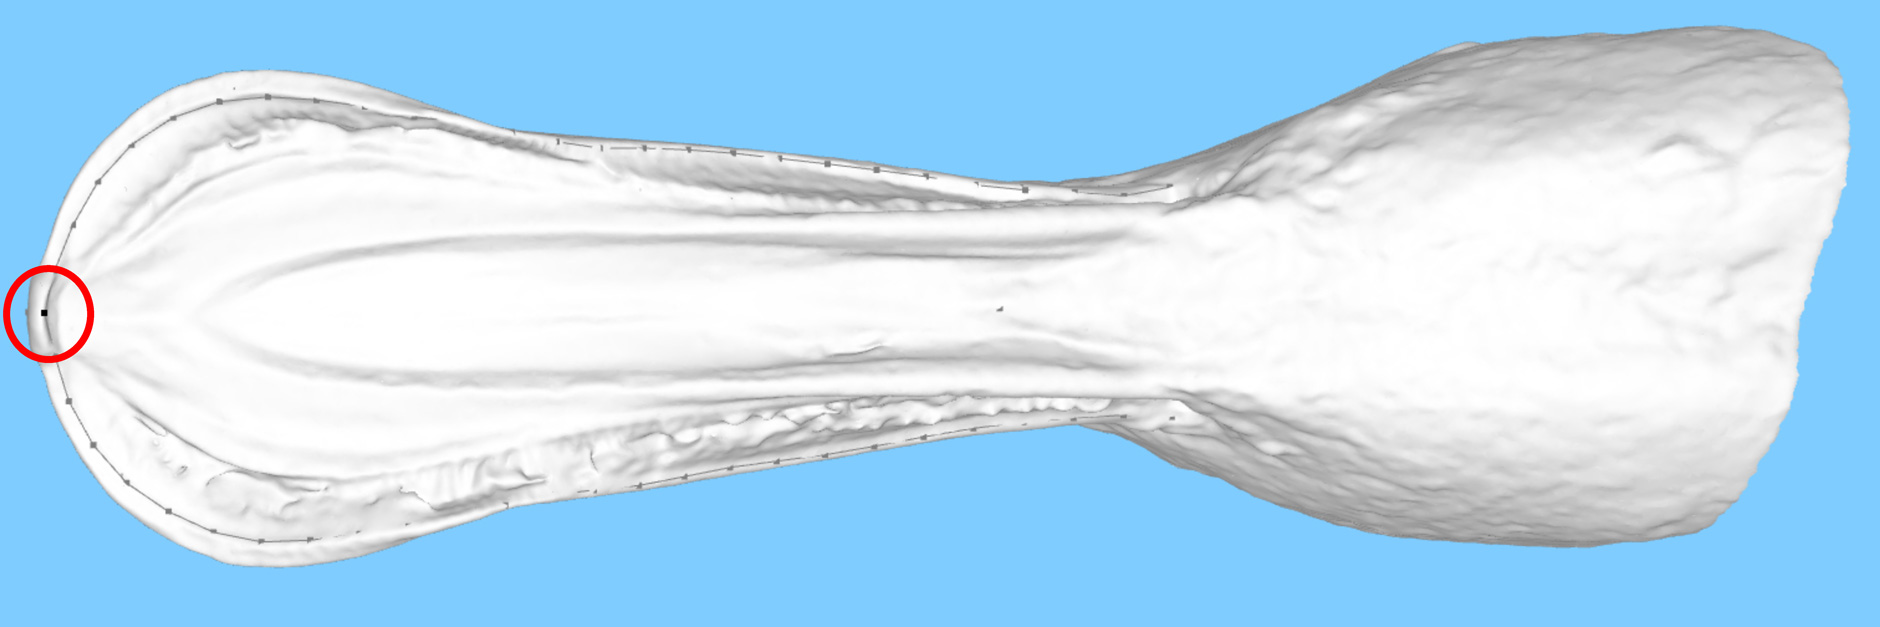
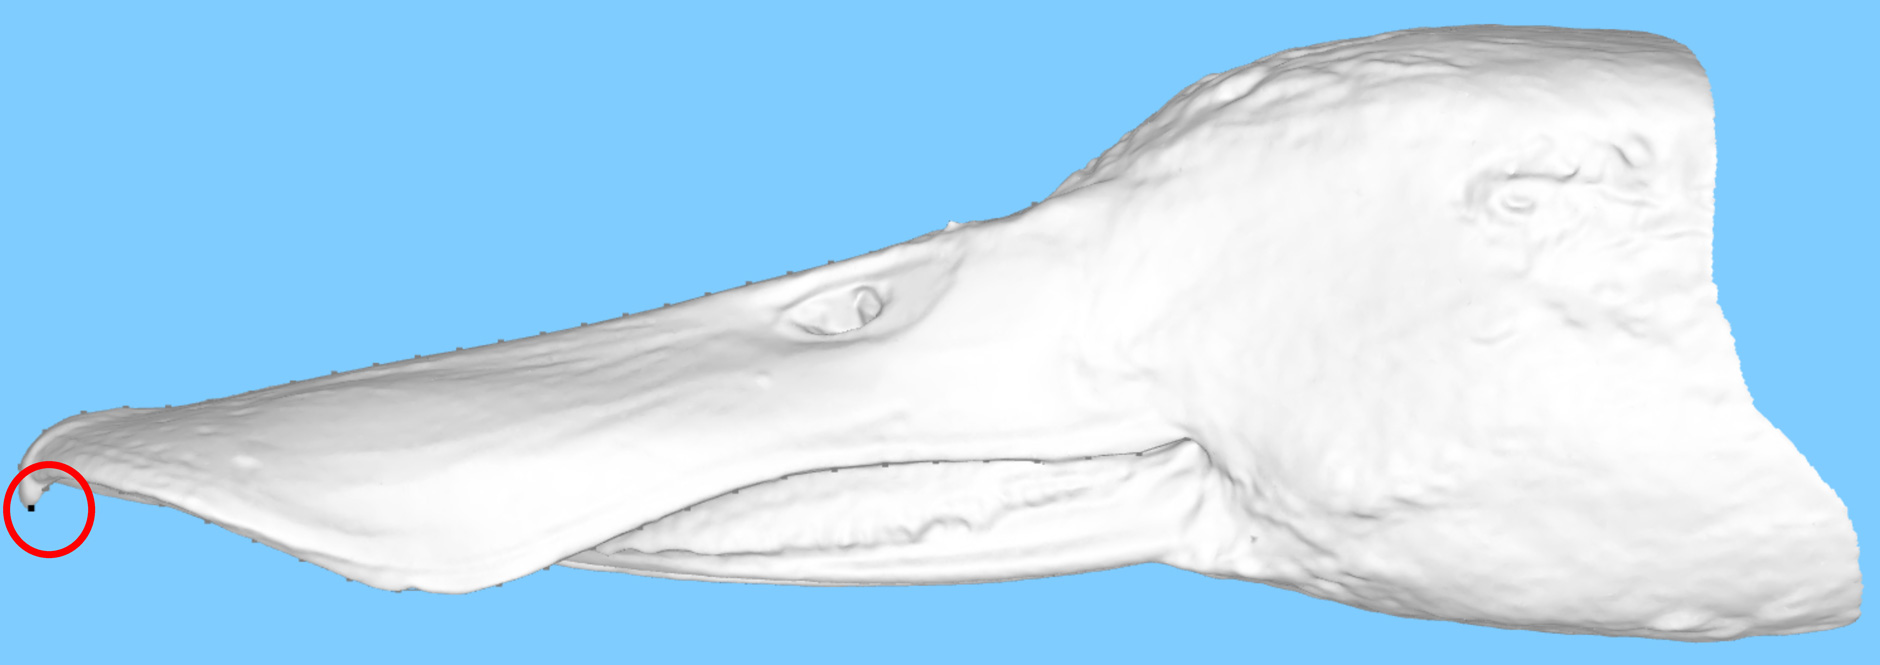
The point is on the centre line where the left and right edges meet, at the lowest possible position. Notice how this point is not the forward-most position, because the left and right edges don’t meet at the very front!
Here’s another example on a type of woodpecker, the Williamson’s Sapsucker (Sphyrapicus thyroideus). The tip of a woodpecker’s beak is shaped a bit like a chisel, and doesn’t really have a “point”. The same rules apply here as with the duck: again, the point is placed on the centre line where the left and right edges meet, at the lowest position.
Point 3 Extra Tips
Potentially difficult species include: hornbills, fowl, parrots, raptors, and anything with a daft haircut.
Casques
Hornbills (and a few other species too) typically have elaborate display ornaments on their bills, called casques. The example below is a Narcondam Hornbill (Aceros narcondami). Initially, we’re going to include the casques in our analysis, so place the point at the back of the casque, where the bill meets the feathers.
Ceres
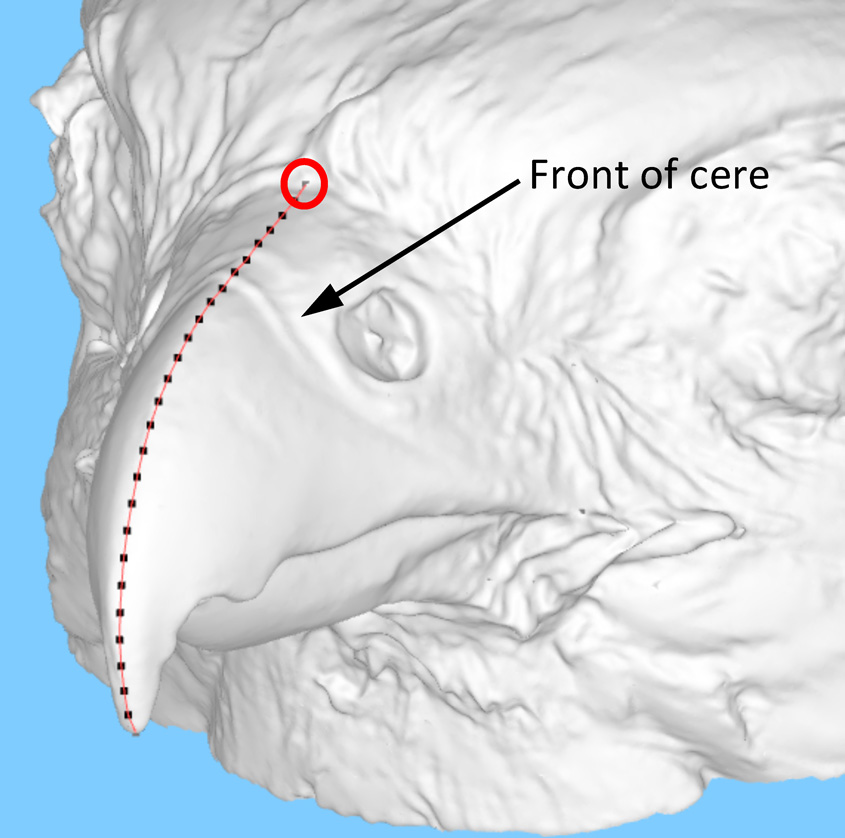
A few types of bird (including birds of prey, parrots, and pigeons) have a covering around the nostrils called a cere. In life, the cere is often a different colour to the rest of the beak, but sadly our scanners don’t record colour!
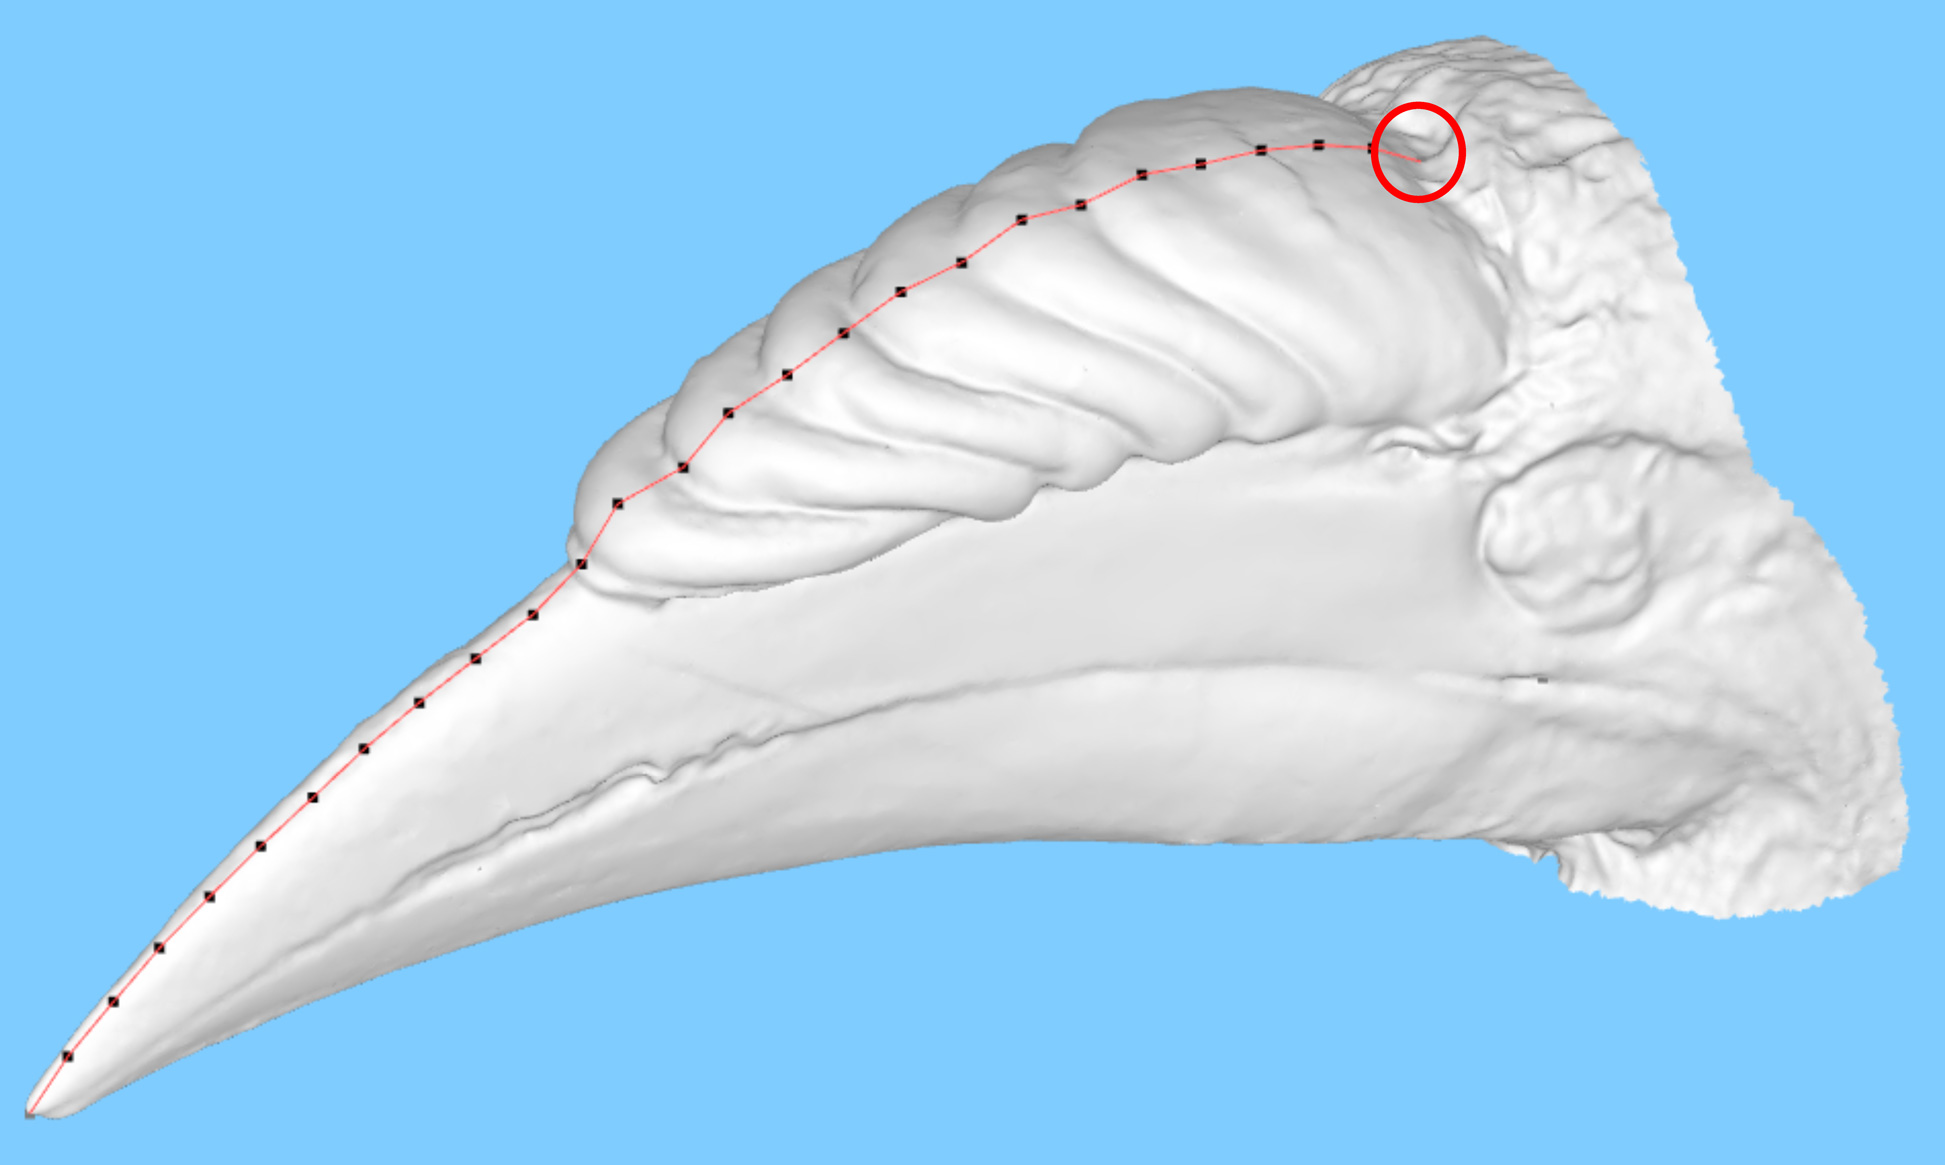
When you place Point 3, we’d like you to place it at the back of the cere, like in these examples of a Peregine Falcon (Falco peregrinus) and a Greater Vasa Parrot (Coracopsis vasa).

CC Attribution-Share Alike 2.0 © Dennis Jarvis, Flickr. Cropped from original. https://www.flickr.com/photos/archer10/2587959890/
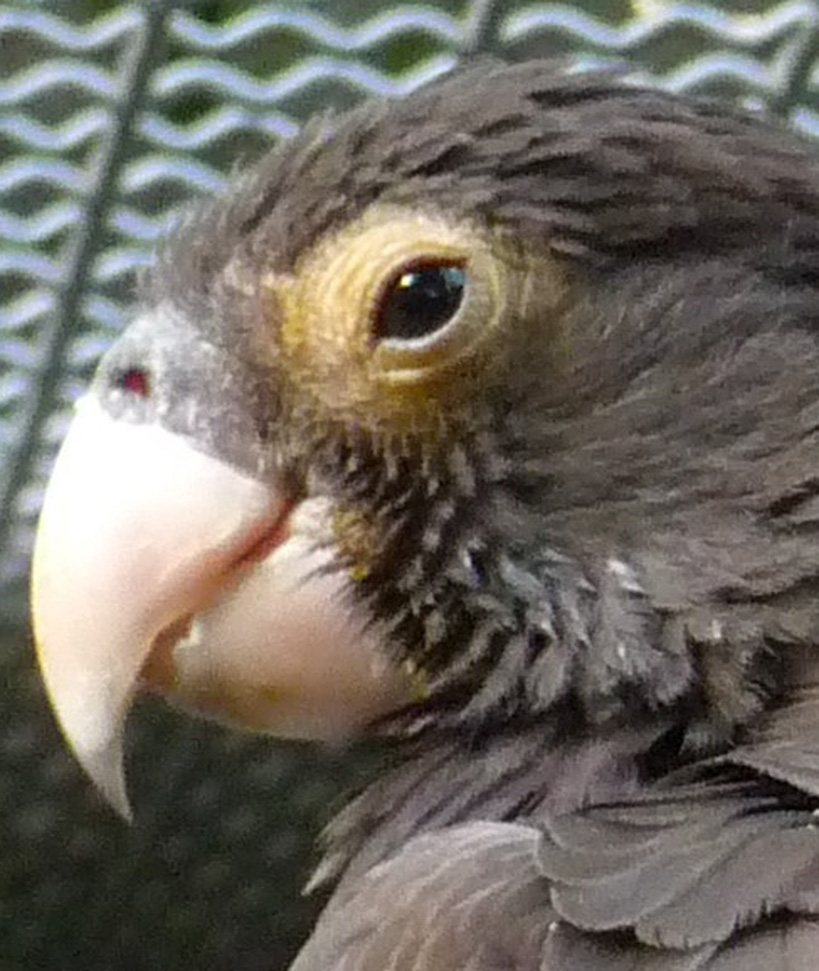
CC Attribution-Share Alike 3.0 © 4029mdk09, Wikimedia Commons. Cropped from original and horizontally flipped. https://commons.wikimedia.org/wiki/File:Coracopsis_vasa.JPG

Caruncles
Fowl and waterfowl may have a fleshy protuberances from their bills. Examples of this are the wattles and snoods of turkeys, or the lump at the base of a swan’s bill. We do not want to include these in our analysis, especially as they can be flattened in museum specimens. The example below is from the Black-necked Swan (Cygnus melanocoryphus).
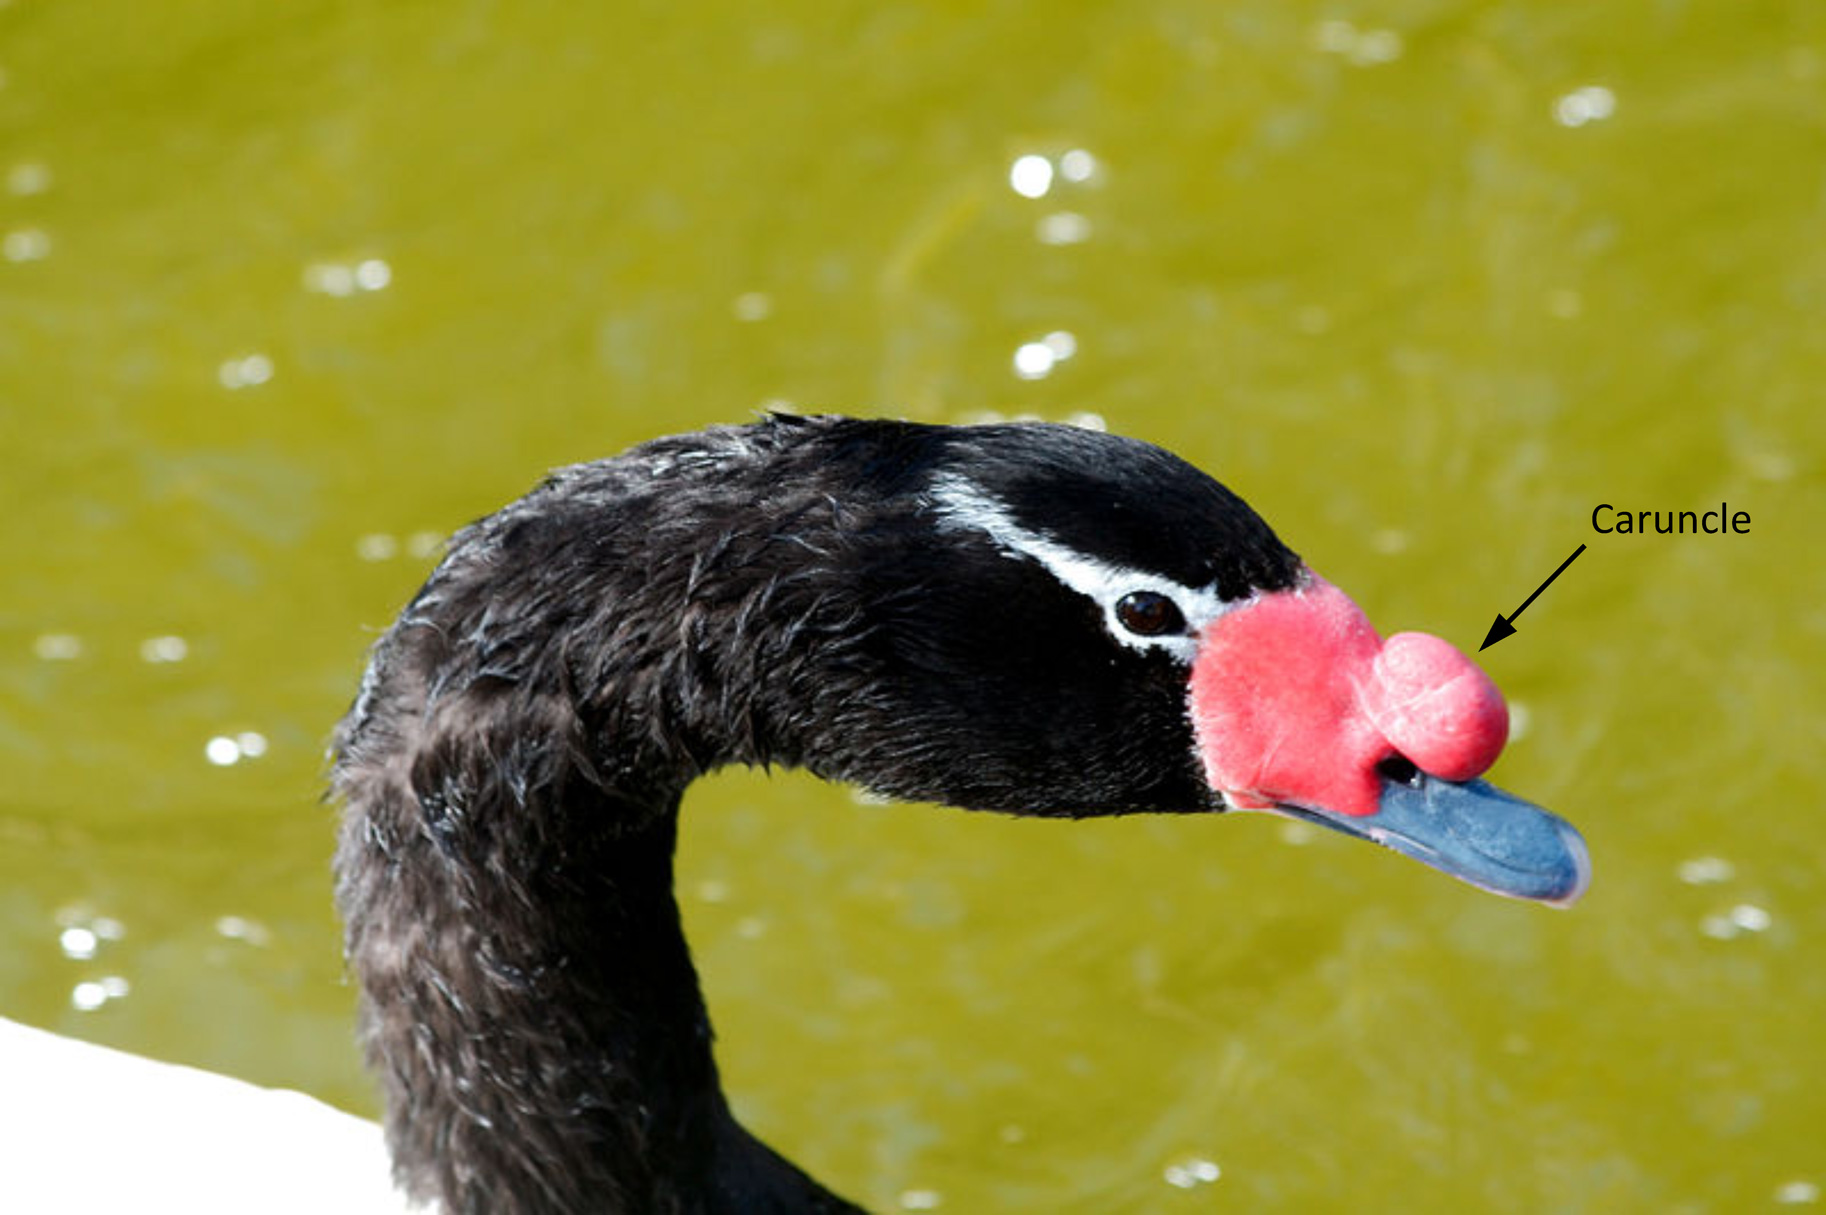
CC Attribution-Share Alike 3.0 © Dori, Wikimedia Commons https://commons.wikimedia.org/wiki/File:Black-necked_Swan_5050.jpg
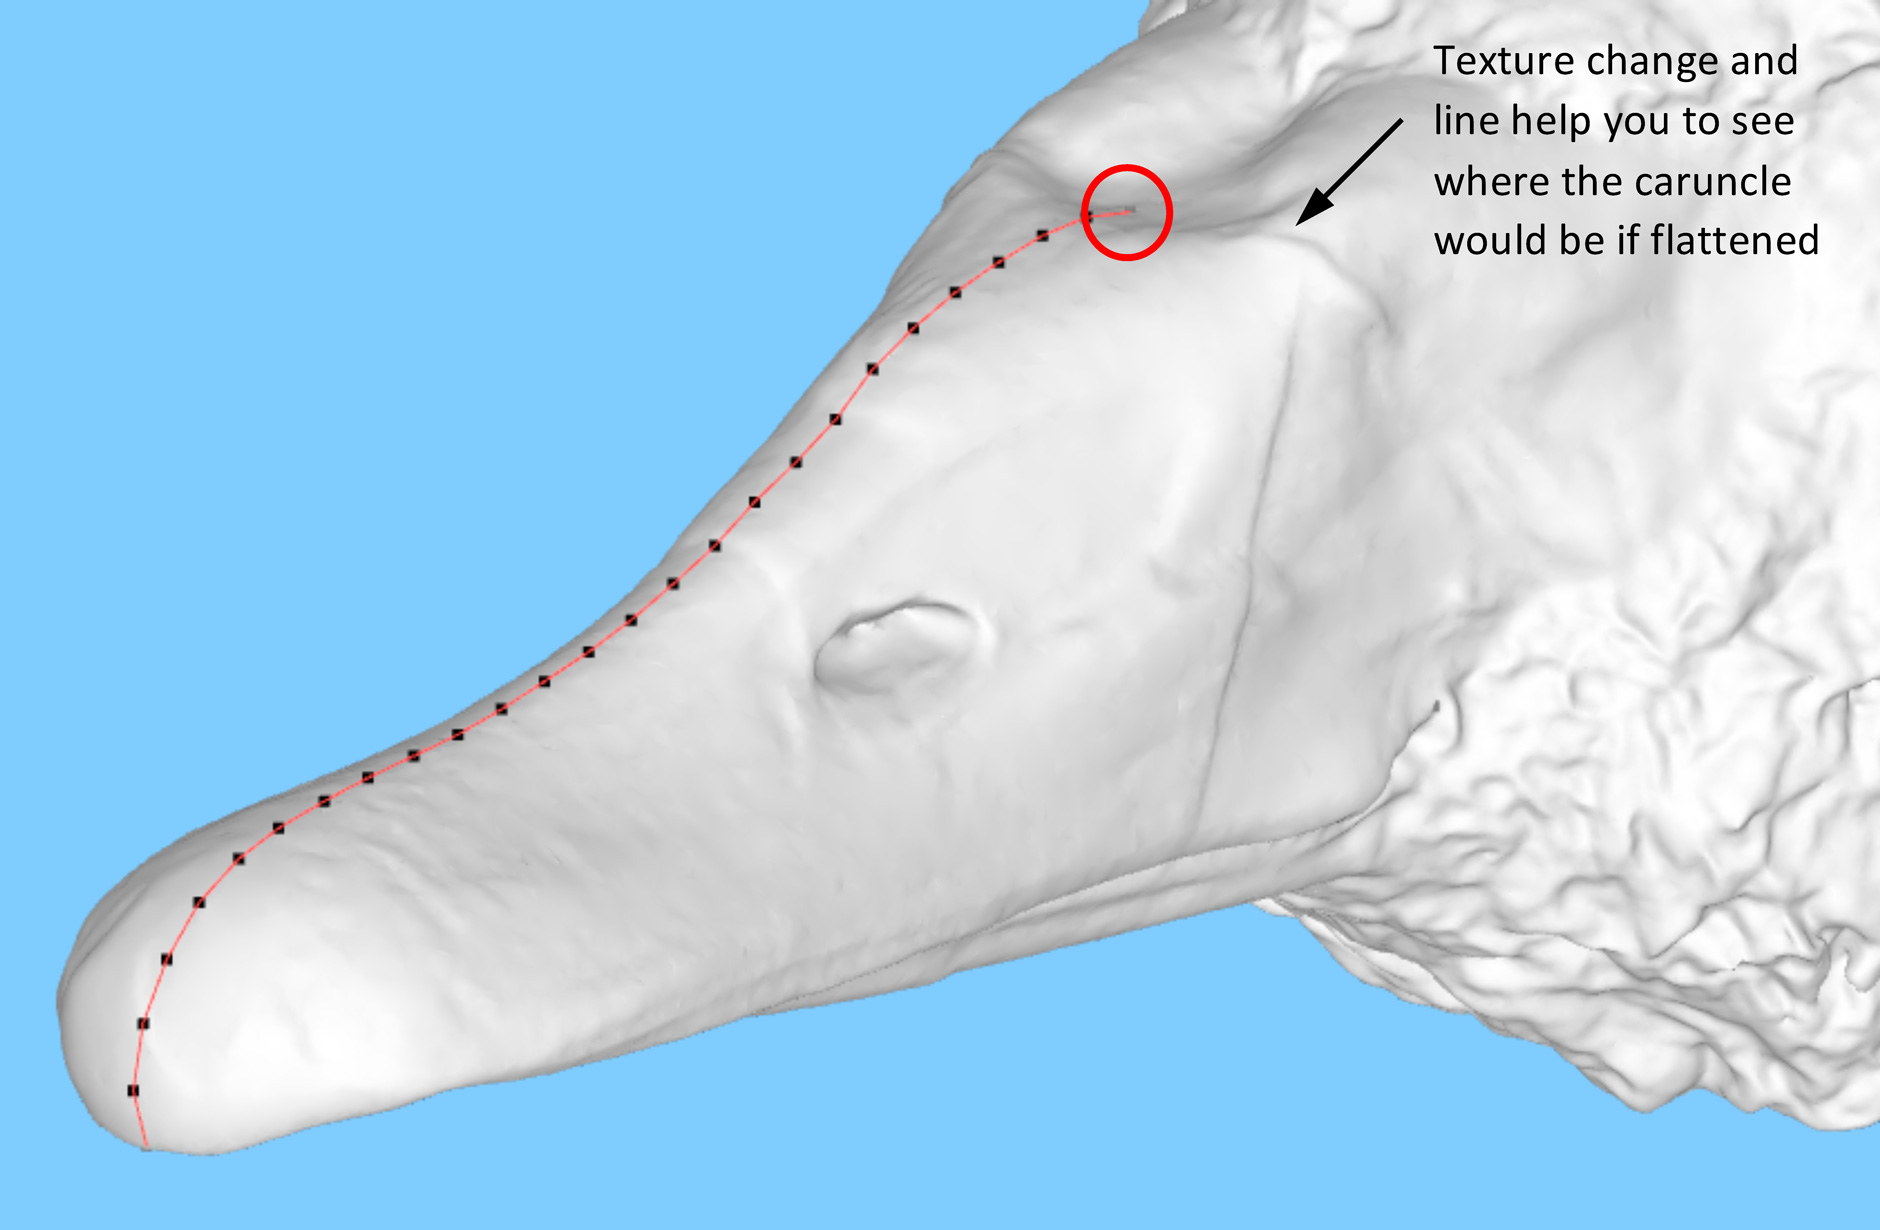
In the specimen we scanned, the caruncle is flattened, but you can tell where it should be because the texture of the scan changes as you move from the bill to the caruncle, as does the slope of the bill. Point 3 should go at the base of the caruncle, or at the point where the texture changes.
Feathers (or lack thereof)
This is a Crested Myna (Acridotheres cristatellus). It has a crest of feathers that stick out, making it difficult to place Point 3. If you get a bird with a lot of feathers covering its face like this, it’s a good idea to do an image search for the same species online. Is this normal for this species, or have we scanned an individual with a particularly outrageous sense of style?
If it’s the former, put the point as far back on the bill as you can, as close to the feathers as possible while still staying on the midline. If it’s the latter, or you’re not sure, flag it up in the comments and we’ll take a look ourselves.
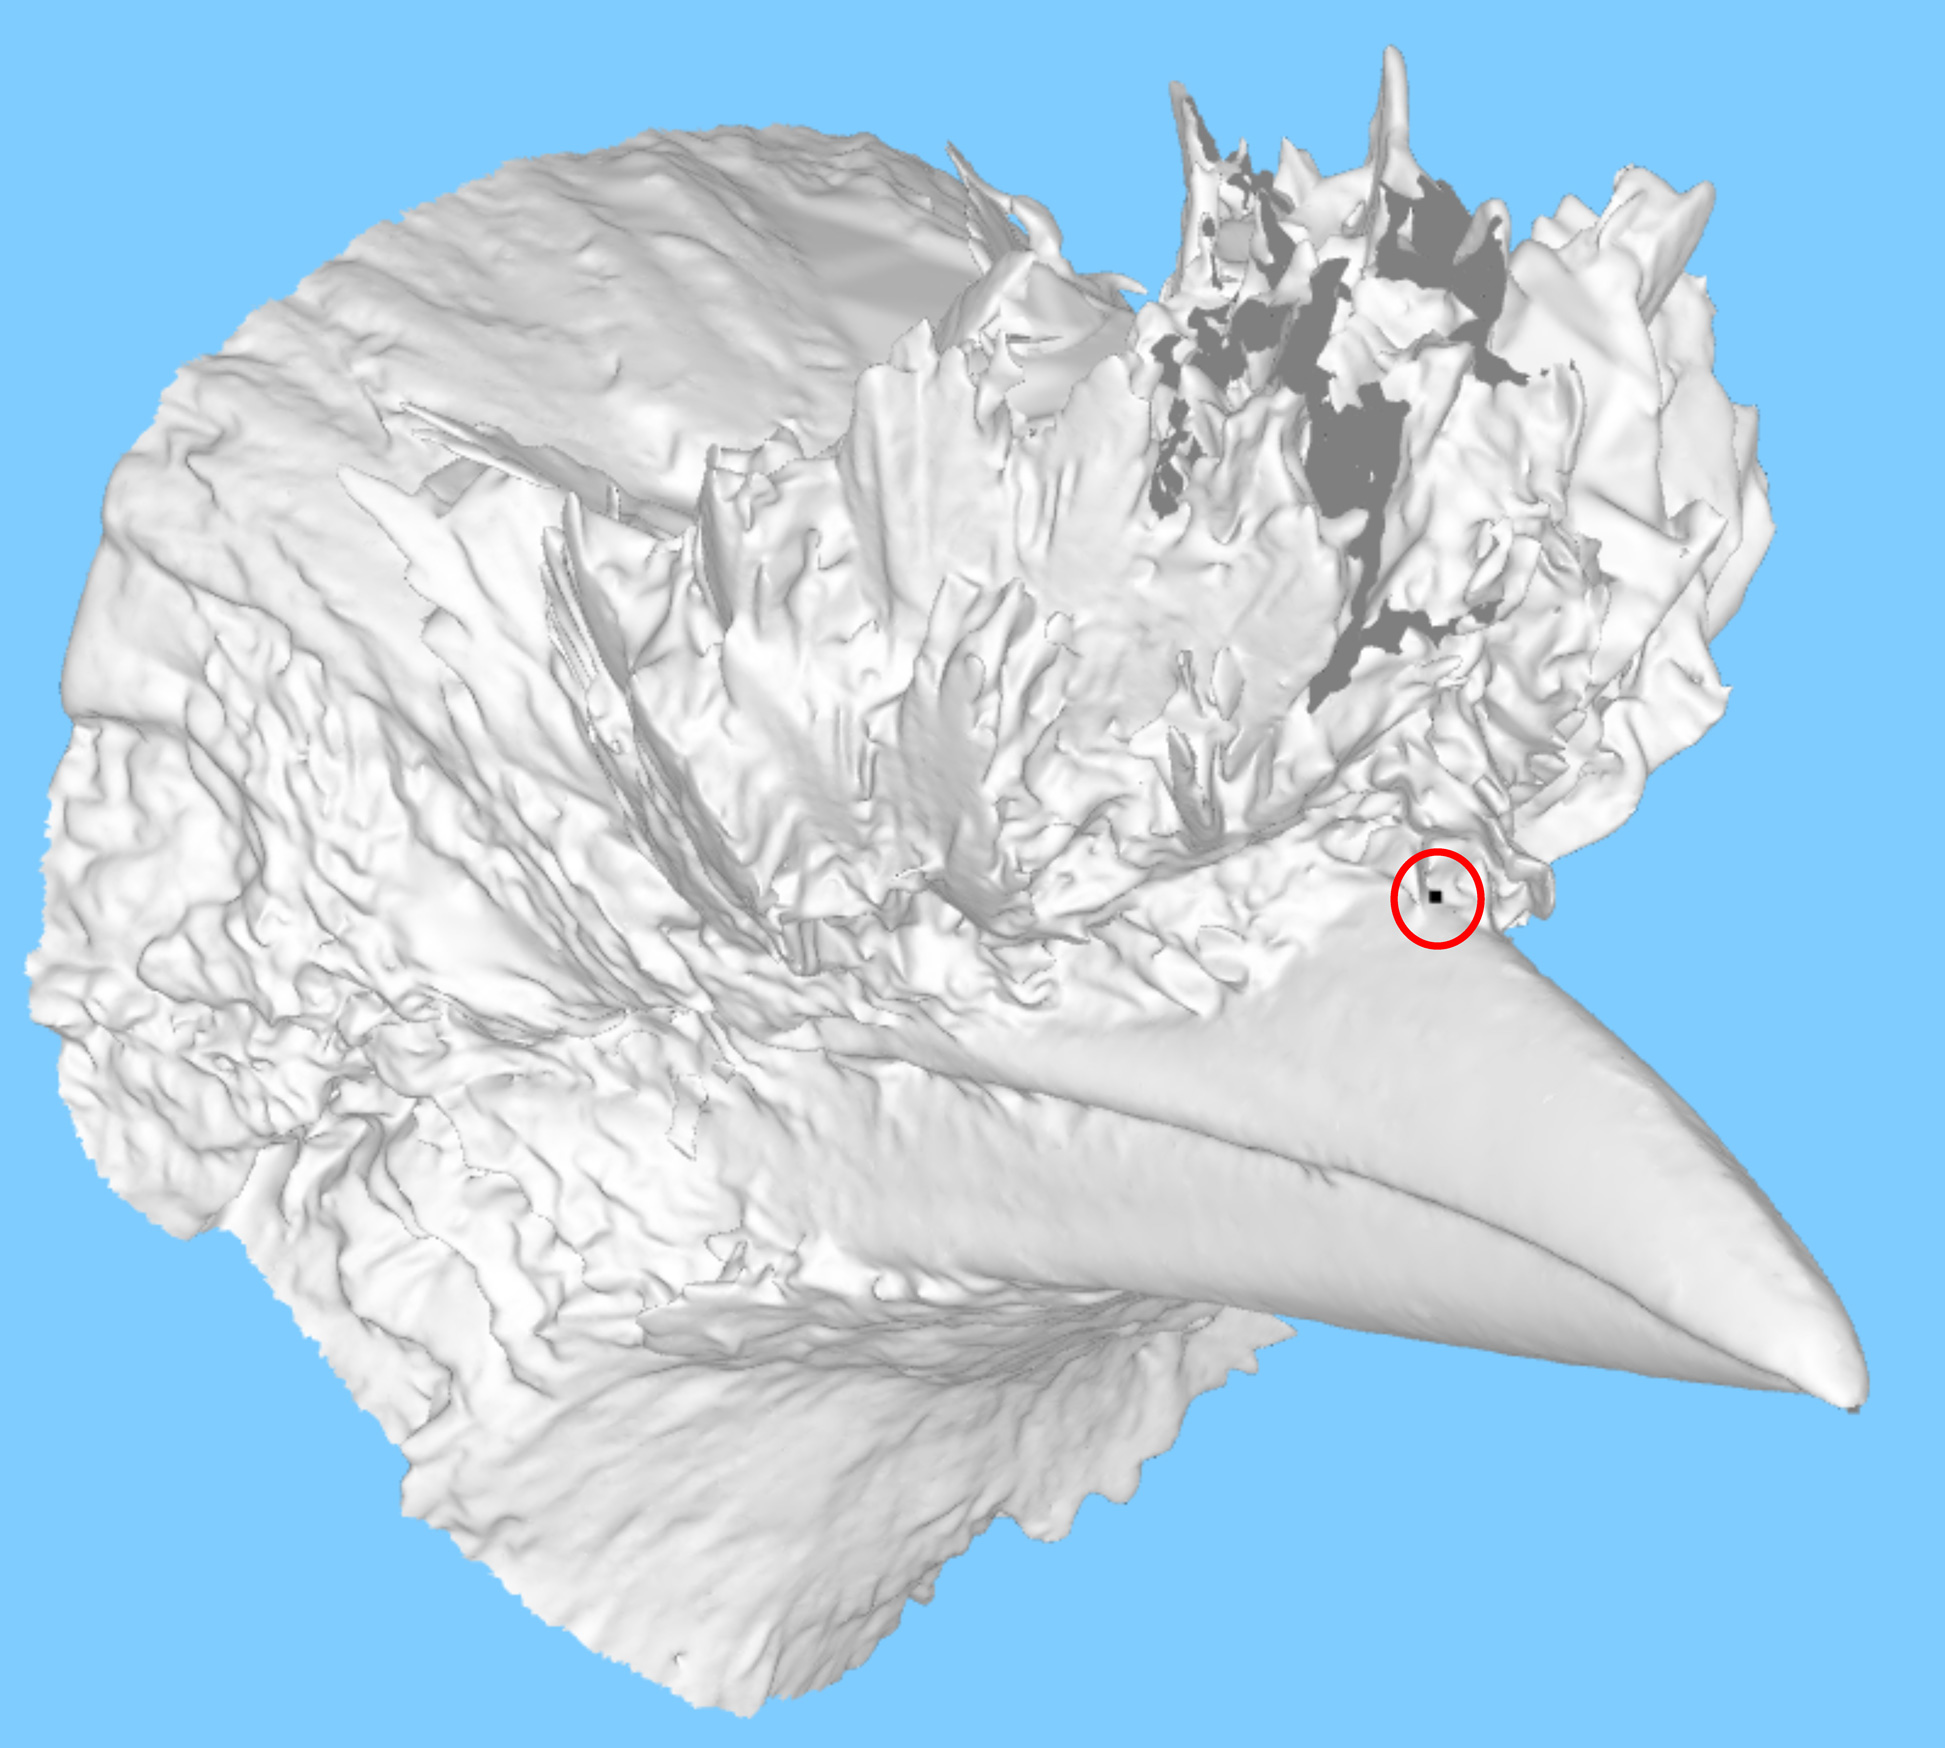
Conversely, some birds (like vultures) have hardly any feathers on their heads at all. In these cases, our marker goes not at the point where the bill meets the feathers, but at the point where the bill meets the skin. Below is an example of a Turkey Vulture (Cathartes aura). Again, you should be able to place the marker based on the change in texture and slope, but it’s also useful to do an image search for the species so you can see colour or other distinctive features.
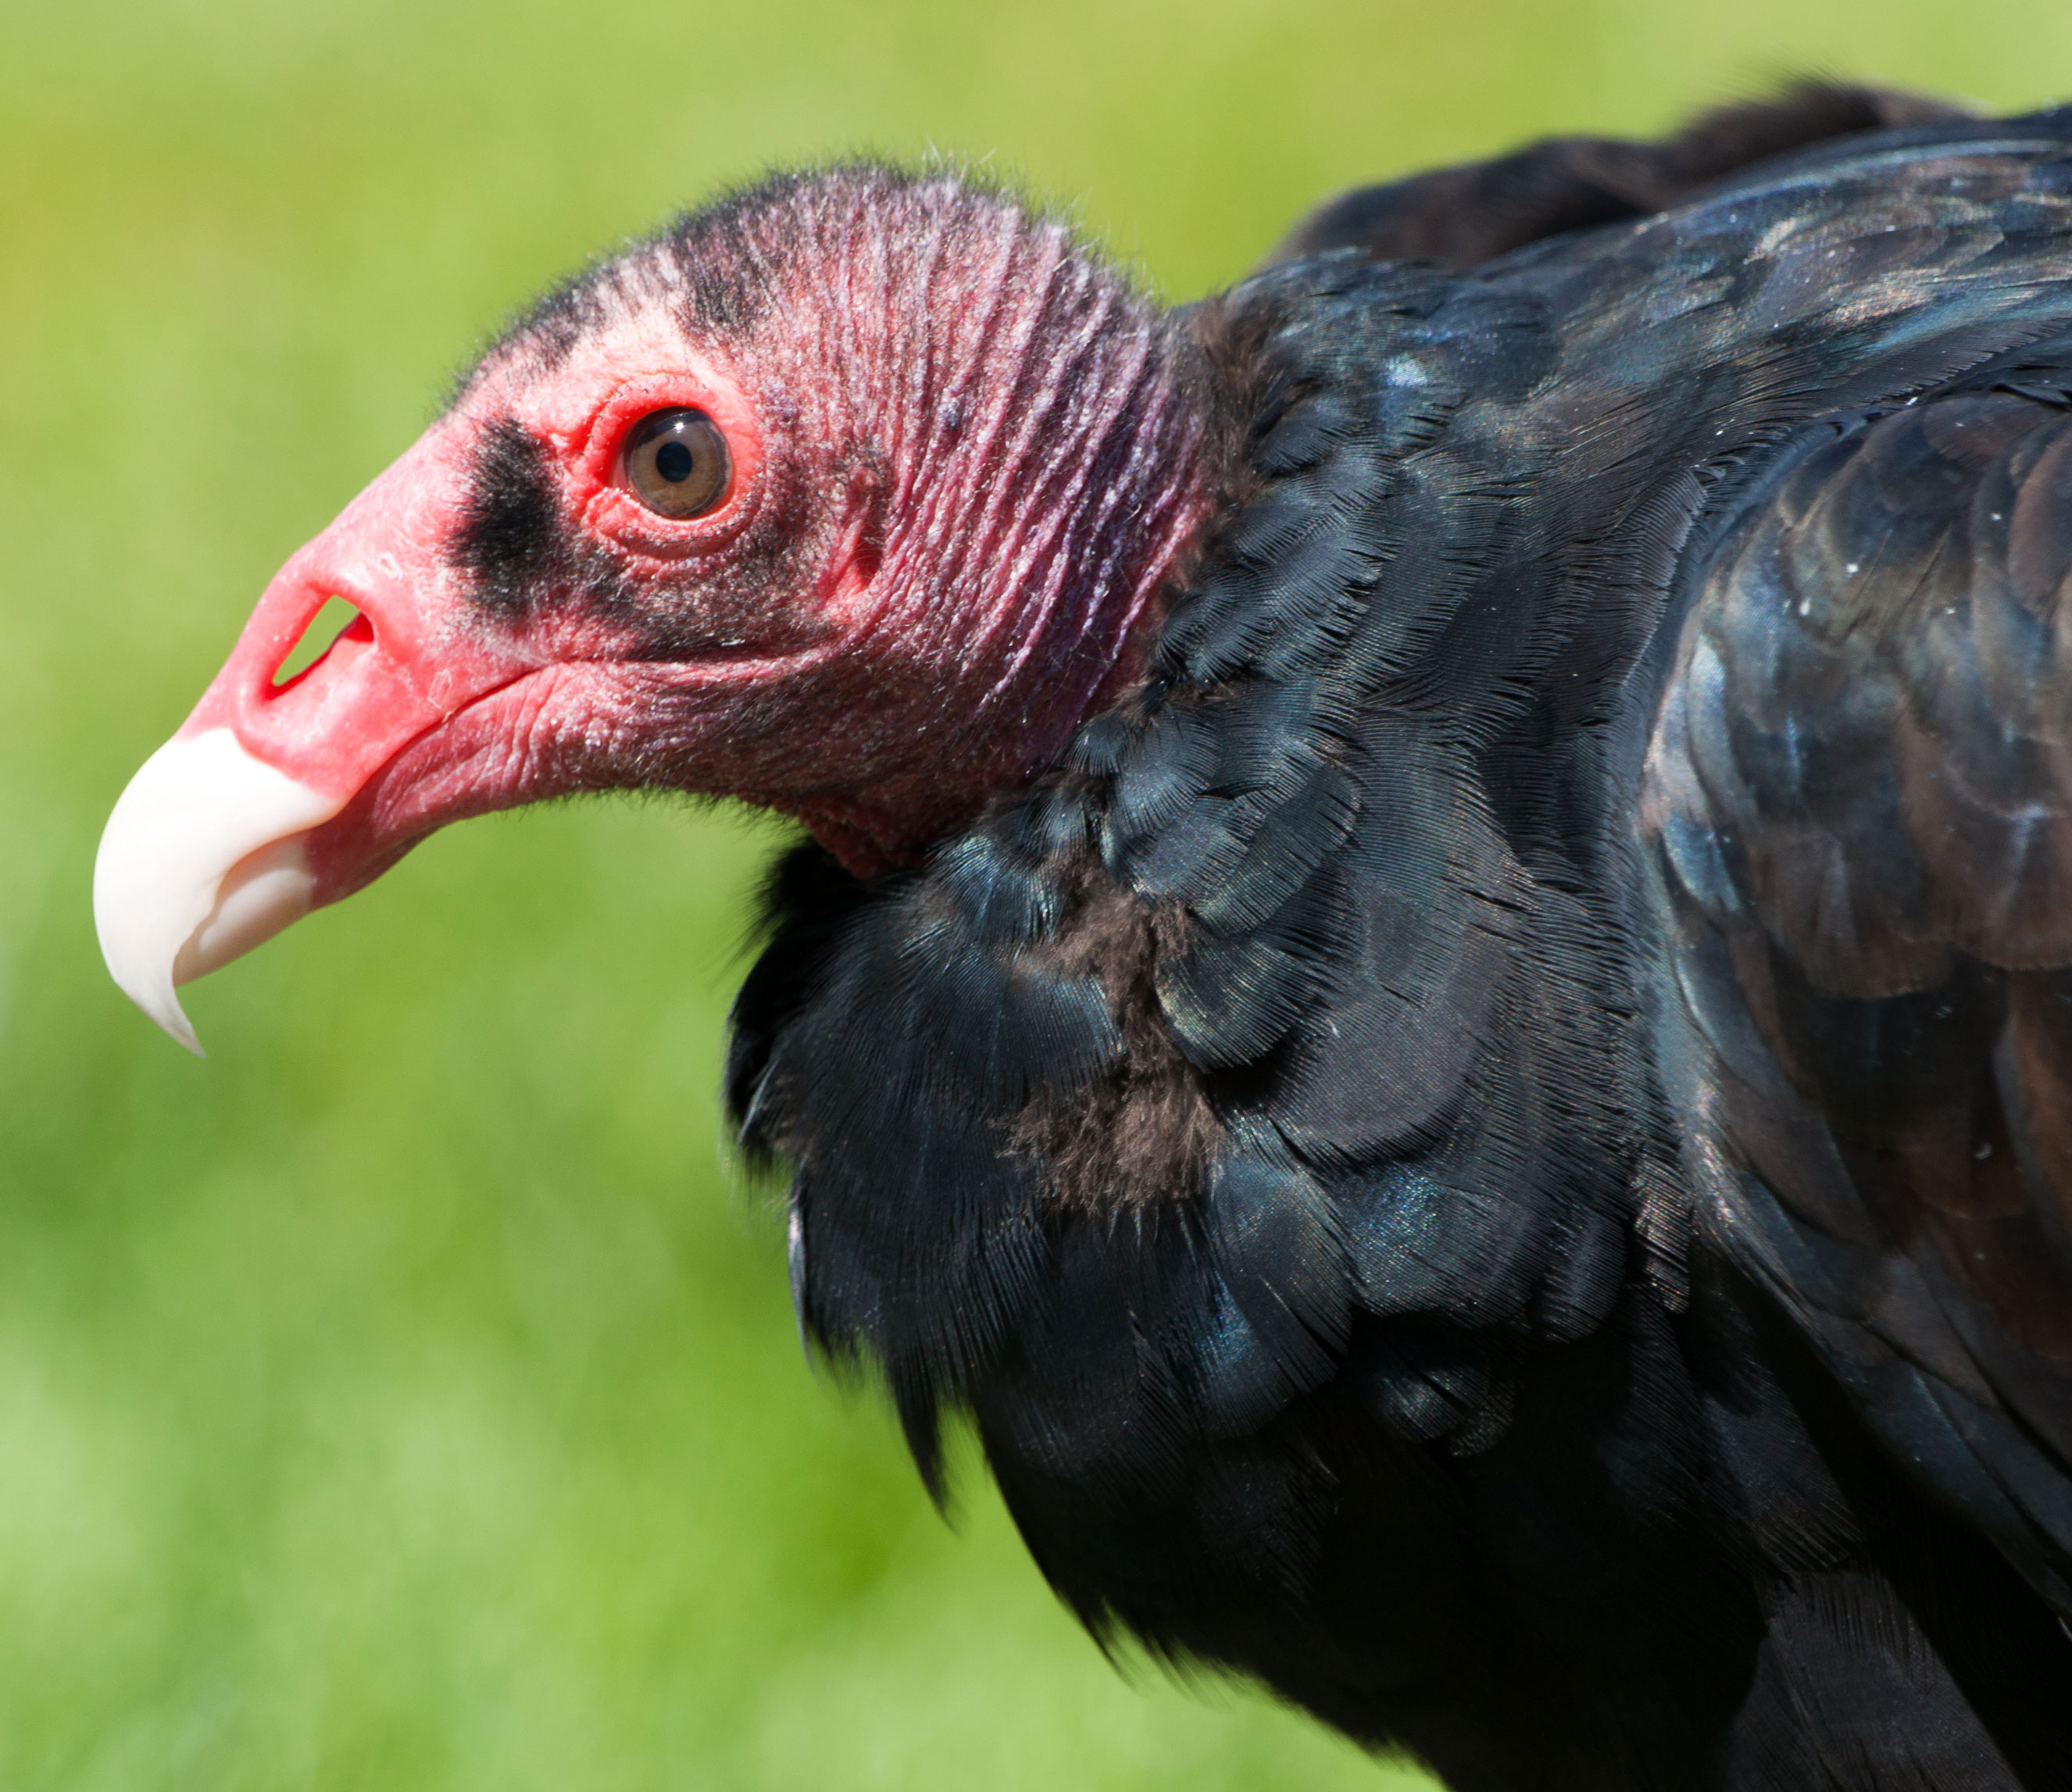
CC Attribution 3.0 © Jason Hickey, http://picasaweb.google.com/111219778721183890368/SanFranciscoZoo?gsessionid=MksfW18C7NEZBOrEtkimHw#5515829167105302978
Point 4 and 5 Extra Tips
We think that these are the hardest points to place. A lot of birds have feathers around the edges of their mouths, and the scanners can find it difficult not to smooth them in to the rest of the bill. This is particularly true of museum specimens, which may be over a hundred years old and starting to look a bit scruffy! So how can you tell if you’re looking at the bill, or at over-smoothed feathers?
Symmetry is a good starting place. All of the birds you will see on Mark My Bird should have symmetrical bills, so if you find that you’ve placed point 4 much further forward than point 5 (or vice versa), then feathers are probably to blame! If this happens, please reject the bill and let us know that this is why.
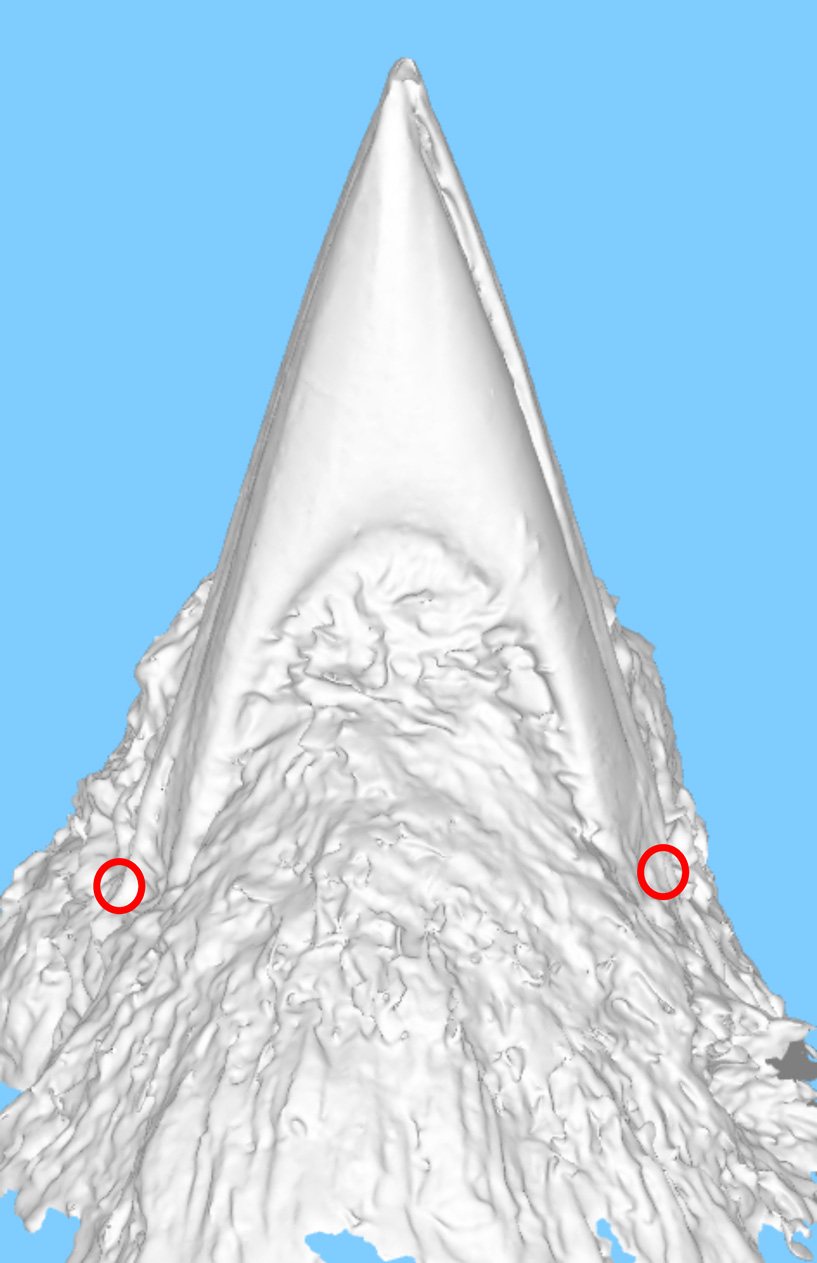
Symmetry is good!
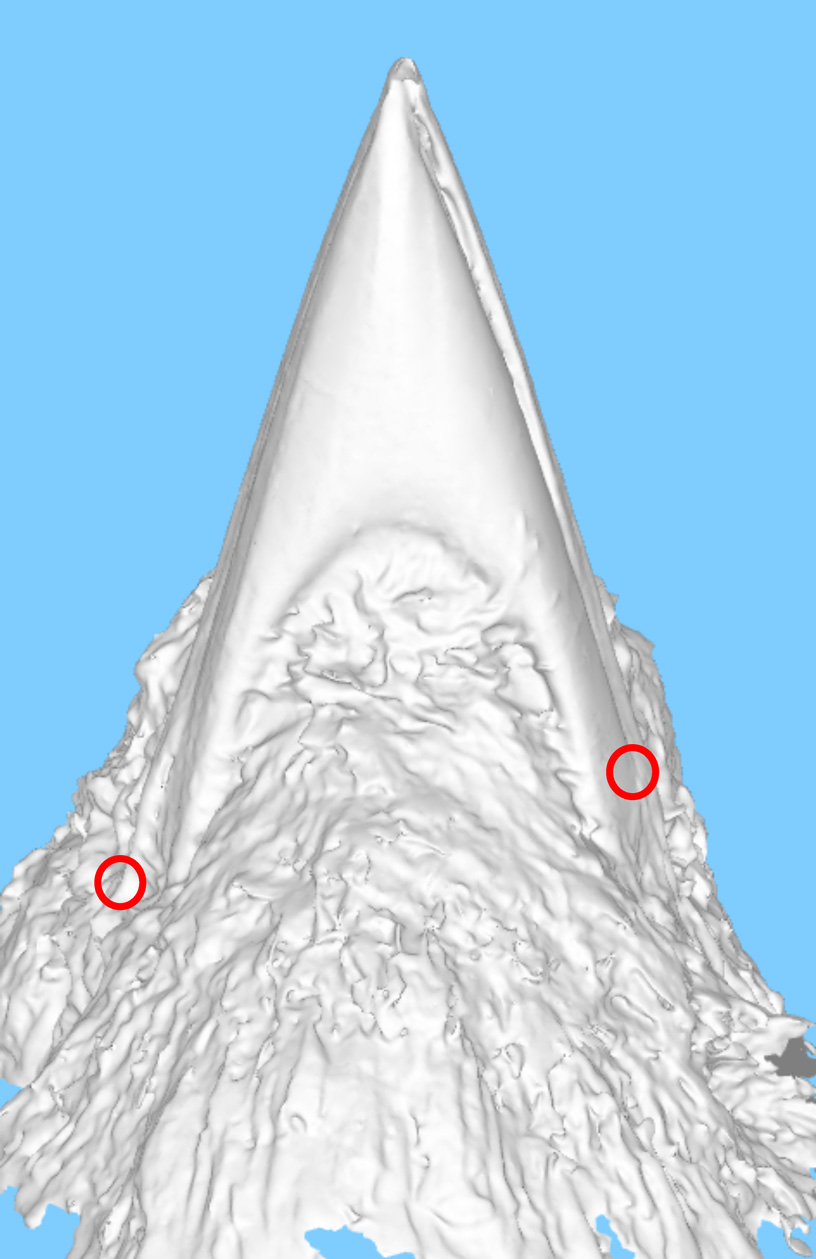
Asymmetry is bad!
You can also use an image search to see where the beak stops and the feathers start on photos of the living bird. This is a very good way of checking that you’re in the right place.
See also the tips for marking the edge curves.
Edge Curve Extra Tips
Potentially difficult species include: ducks, finches, hummingbirds, birds with serrated bill edges
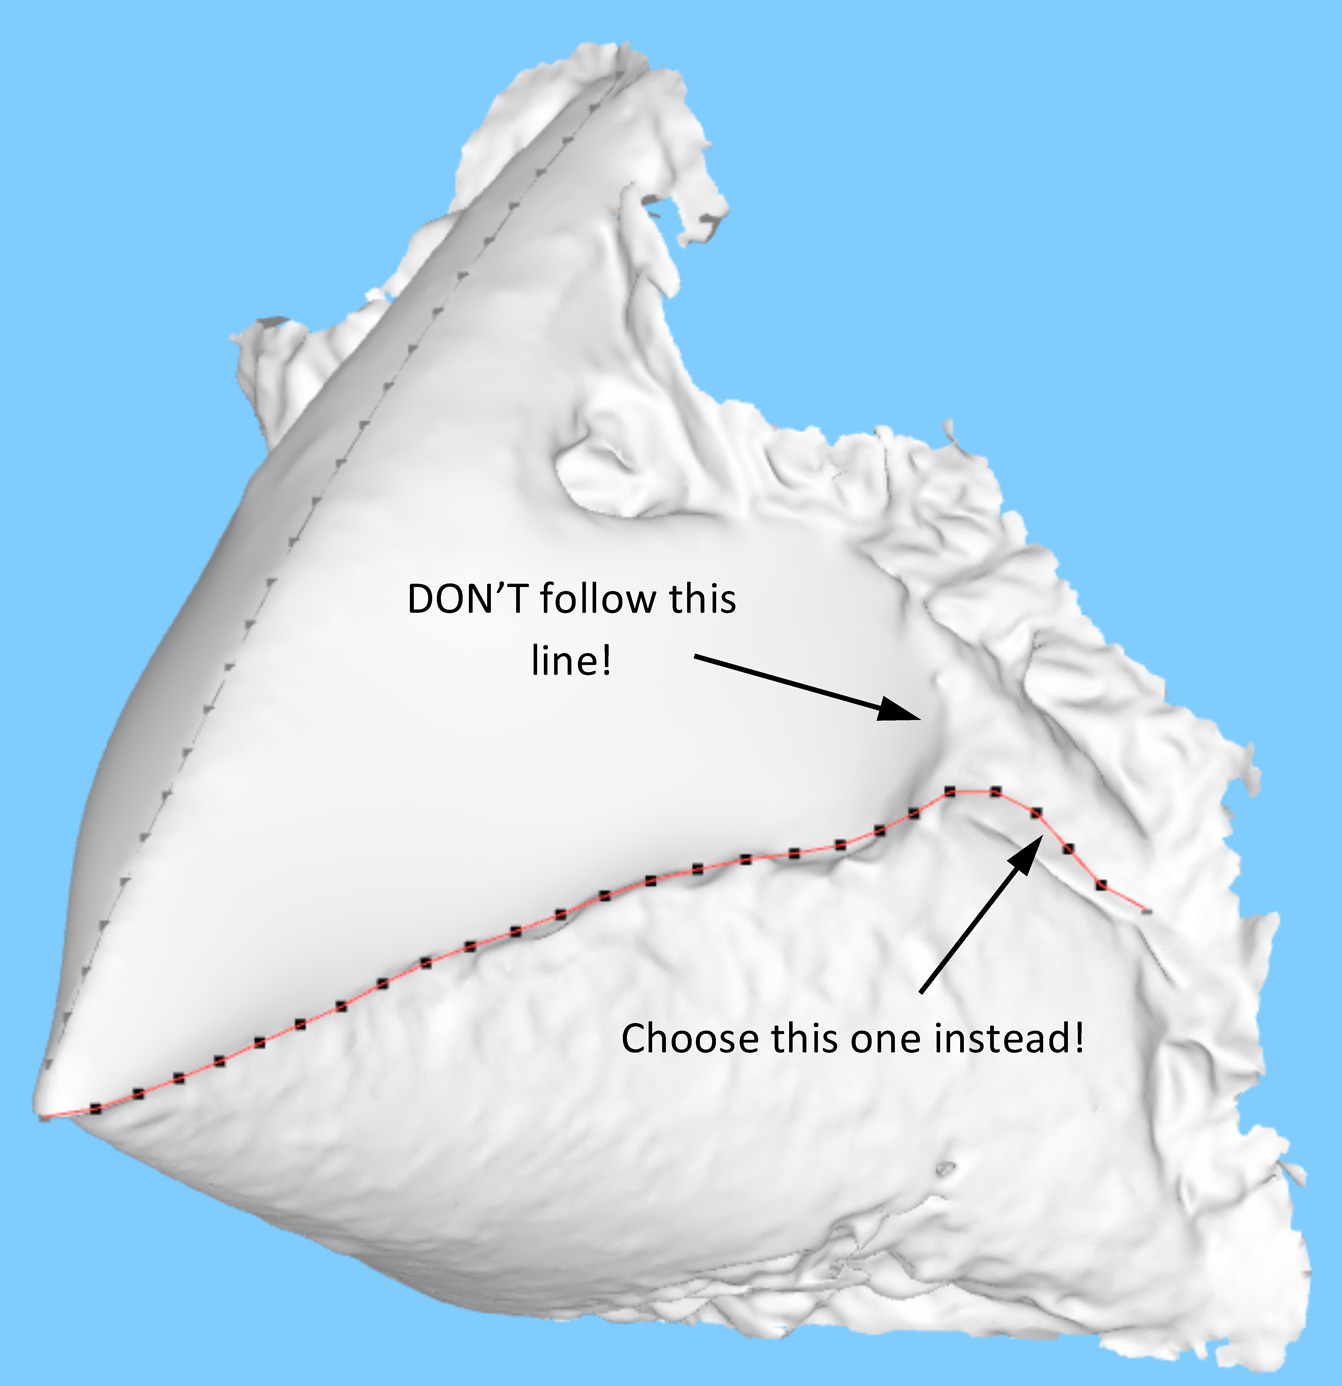
Sometimes, it will look like there is more than one possible edge to follow around the sides of the bill. How should you know which line to choose?
Ducks
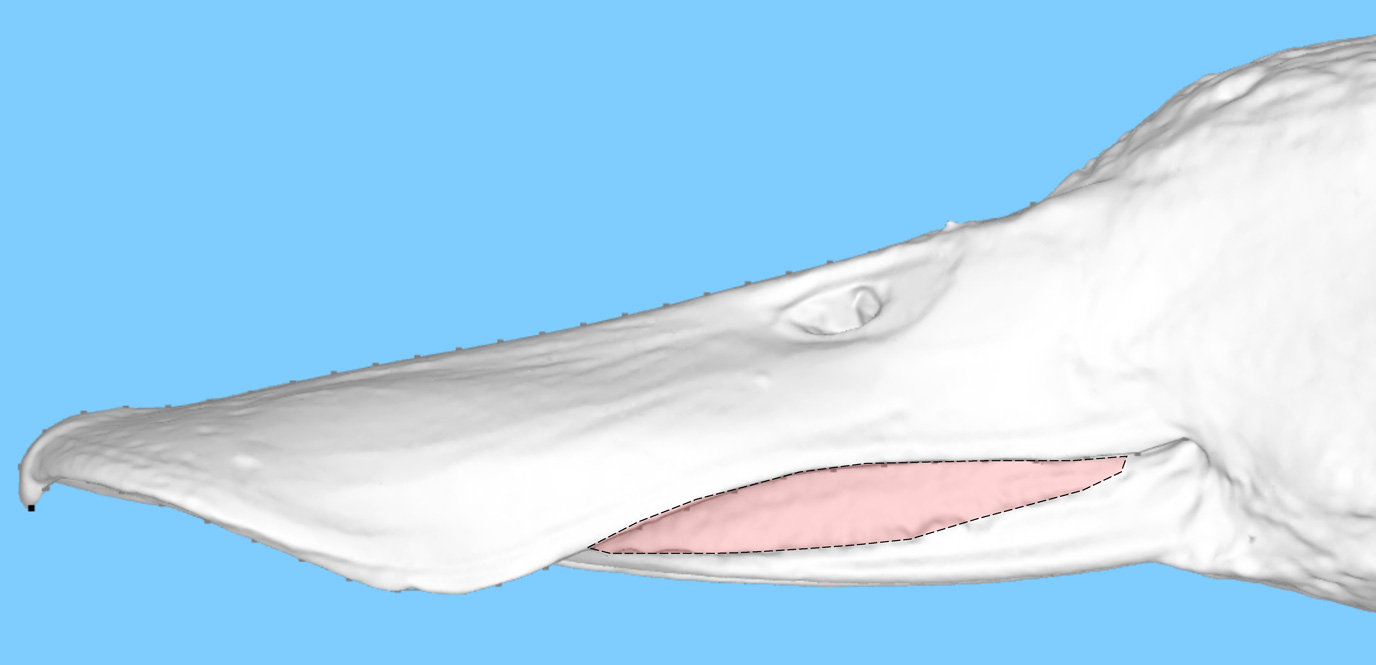
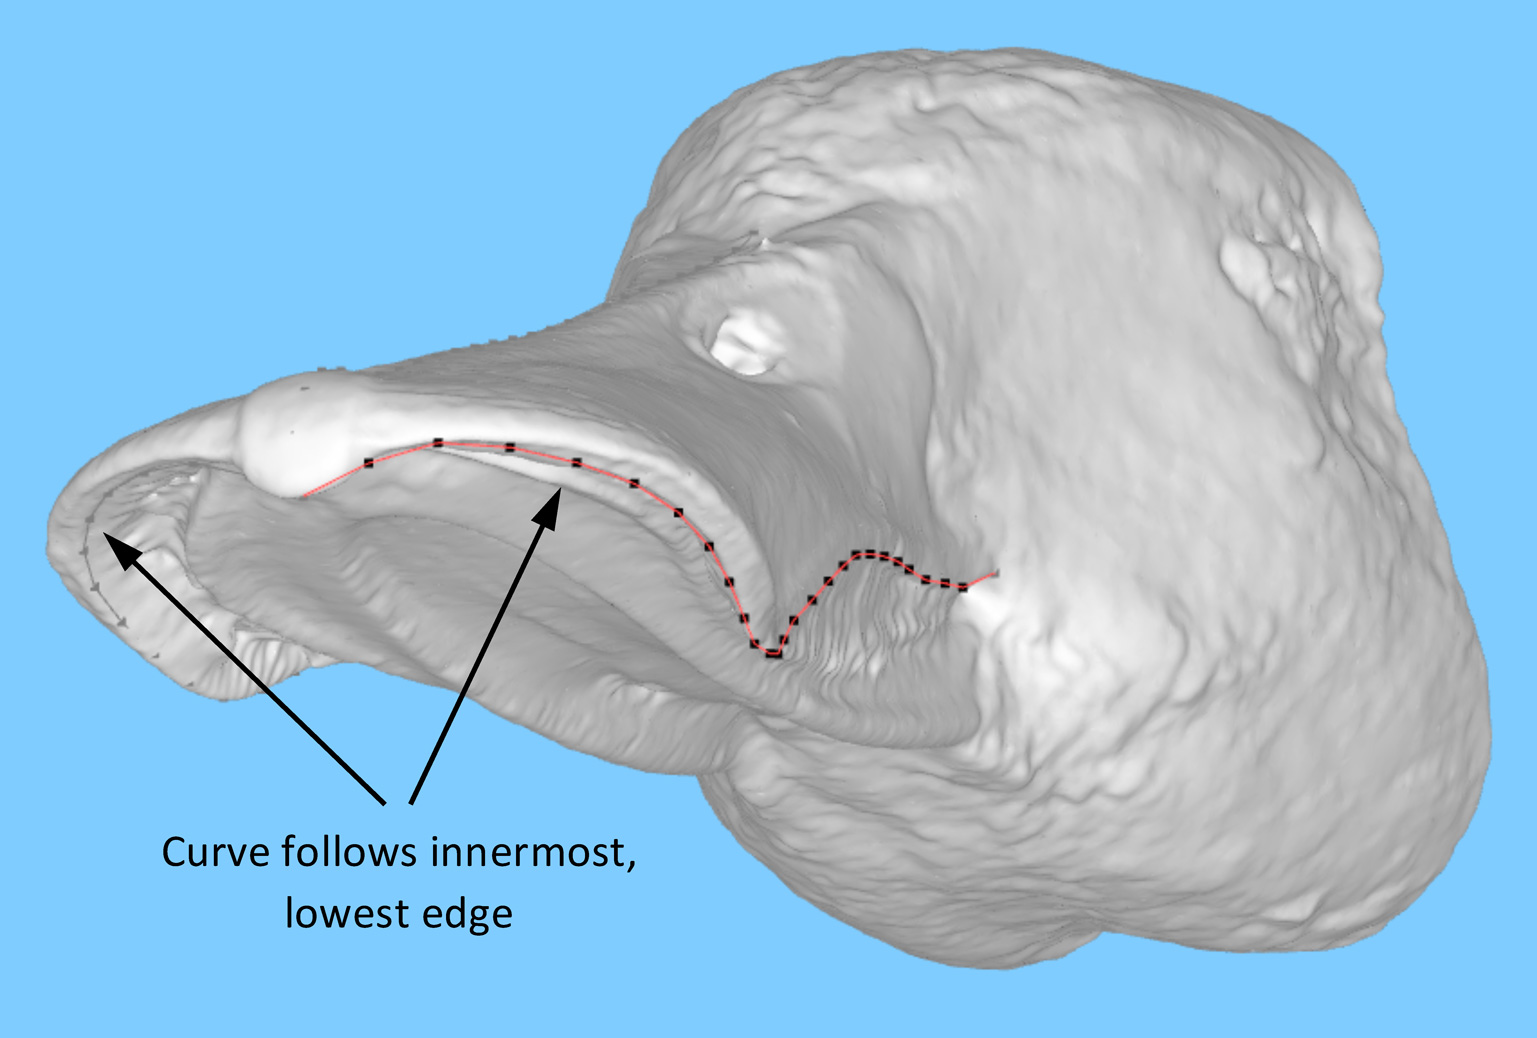
Ducks are particularly awkward, because there will often be two or three possible lines you could follow. Ducks may also have comb-like structures called pectines at the side of the bills, used when filter-feeding. The scanner can’t always make out the fine details of the comb, so can look like it’s been blended together in to one surface, as seen here:
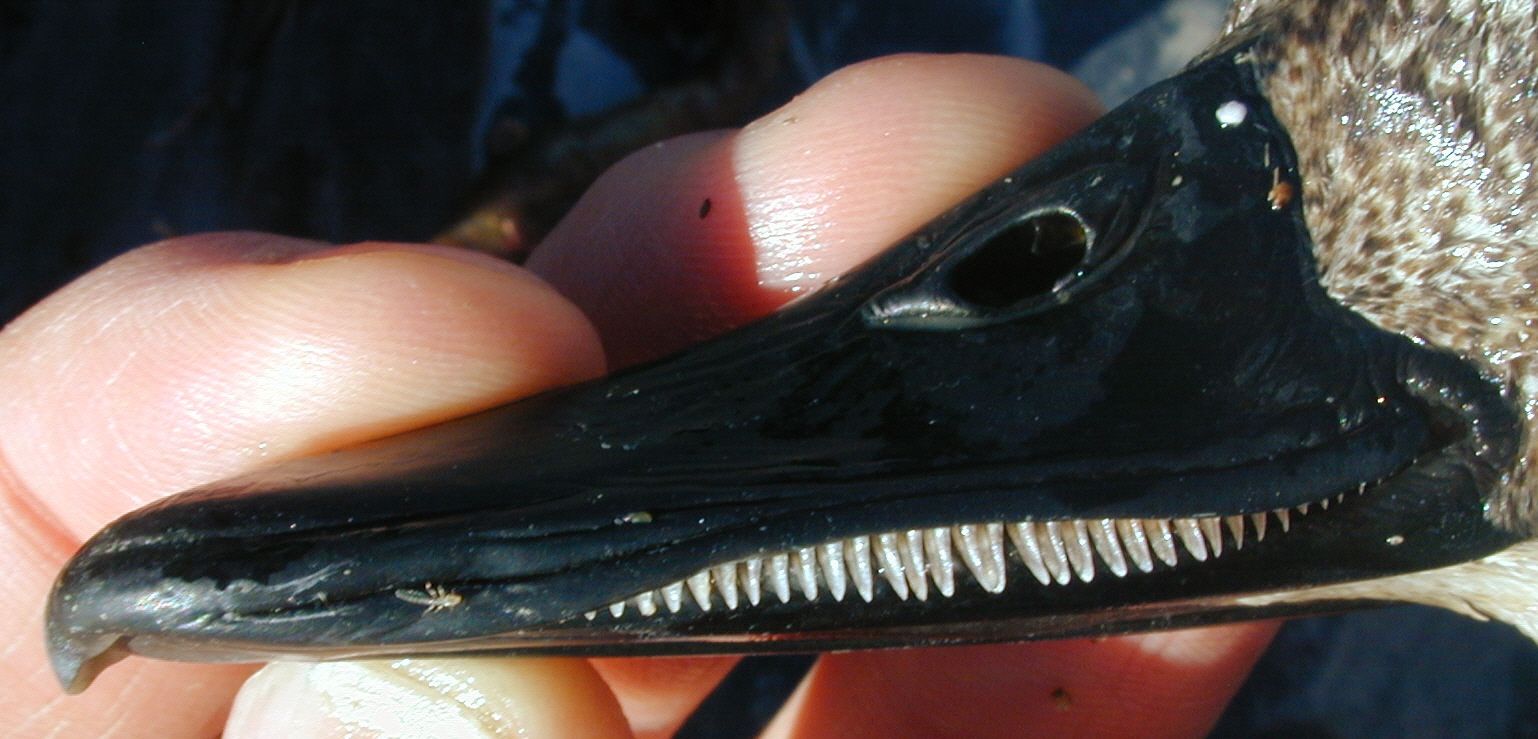
Attribution-Share Alike 3.0 © Stephen Friedt, Wikimedia Commons https://en.wikipedia.org/wiki/File:Duck_1_filter_teeth_edit.jpg
When marking ducks, it’s often very helpful to do an image search for the species you are working on, so you can see exactly where the bill goes. Also, you should:
- Follow the innermost line of the bill edge
- Follow the lowest line of the bill edge
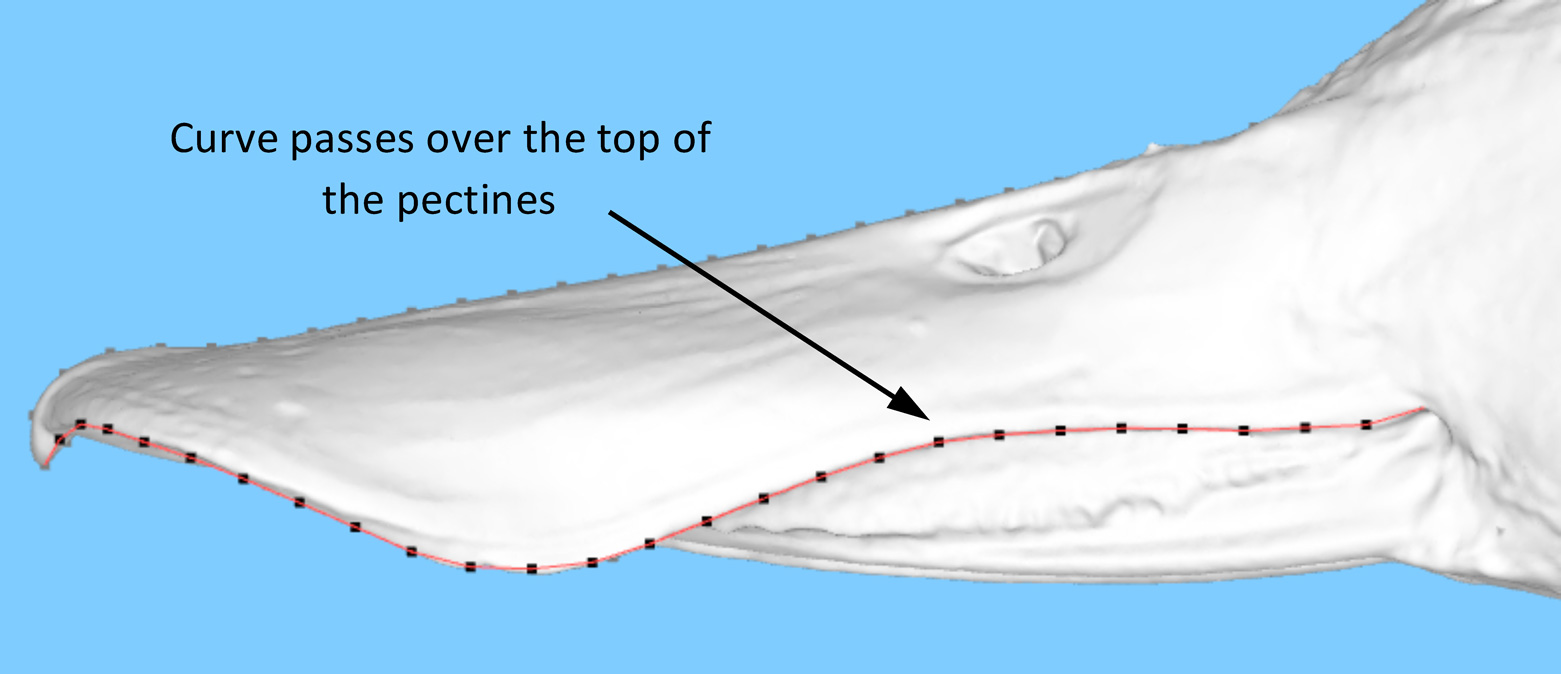
- Follow the line over the top of the pectines
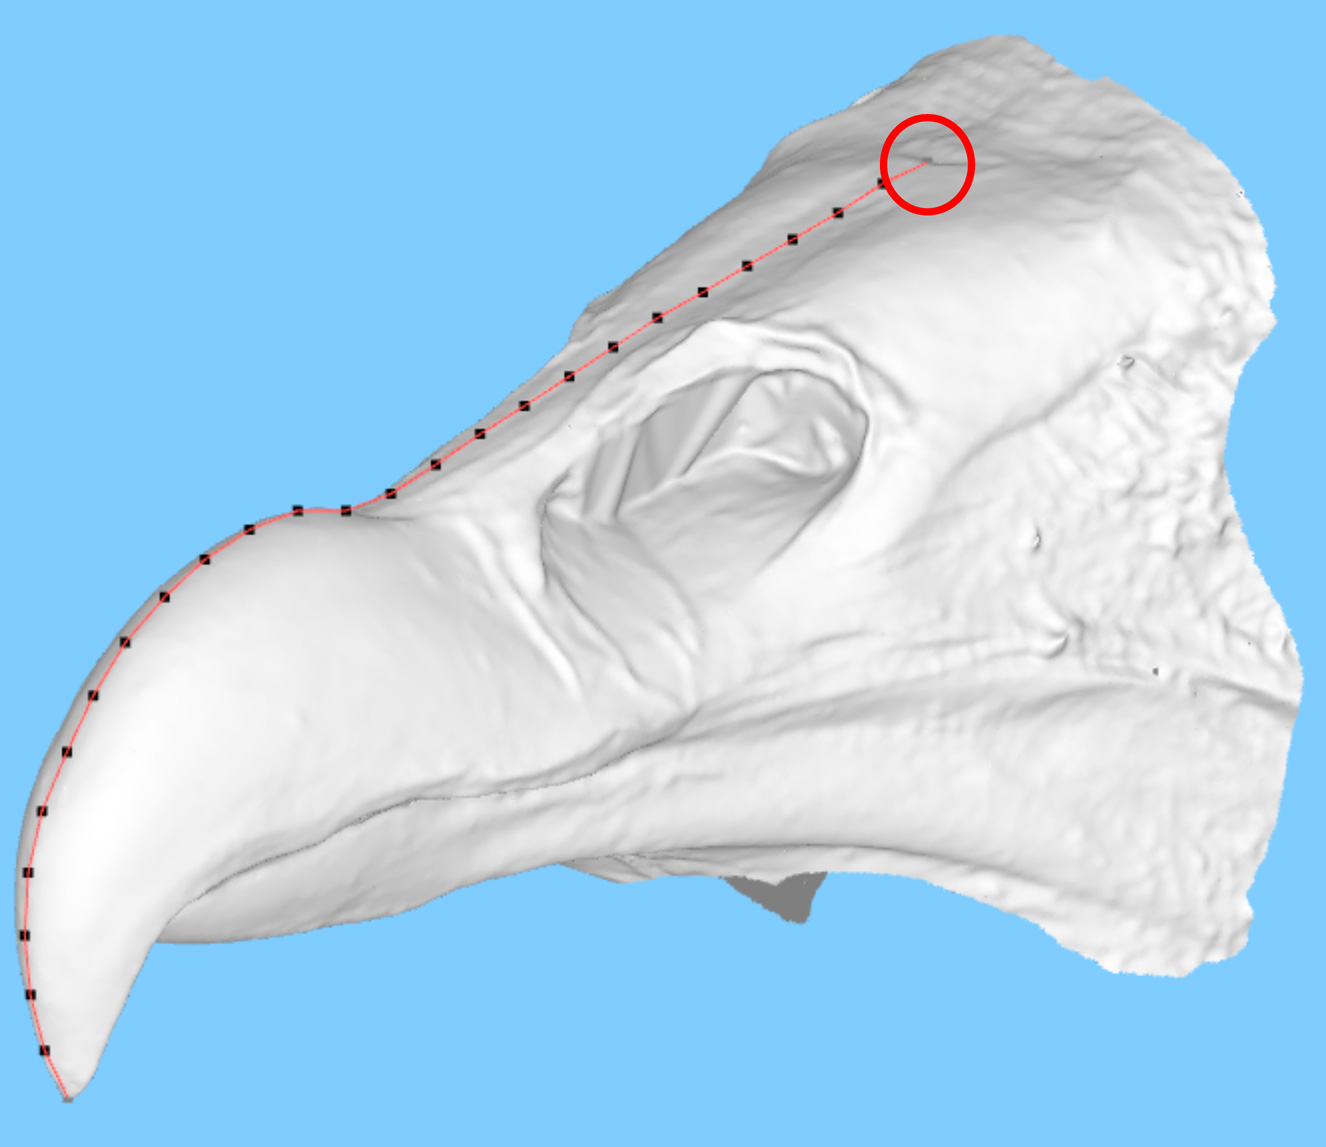
Here’s an example on the Northern Shoveller Duck, Anas clypeata.
Finches and finch-like birds
Finches are the poster child for bird evolution. They’re also a bit of a pain to scan, because they tend to have dark, shiny beaks and feathers around the corners of their mouths. Their bills also downturn sharply before they meet the feathers, but confusingly they have a ridge going in the opposite direction! We’d like you to follow the downturned line, and watch out for feathers covering up the edges! The example below is a Cuckoo-finch, Anomalospiza imberbis.
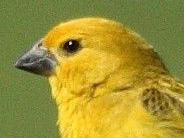
CC Attribution-Share Alike 2.0 © Alan Manson, Flickr. Cropped from original and horiztonally flipped. https://www.flickr.com/photos/12457947@N07/2601316132/
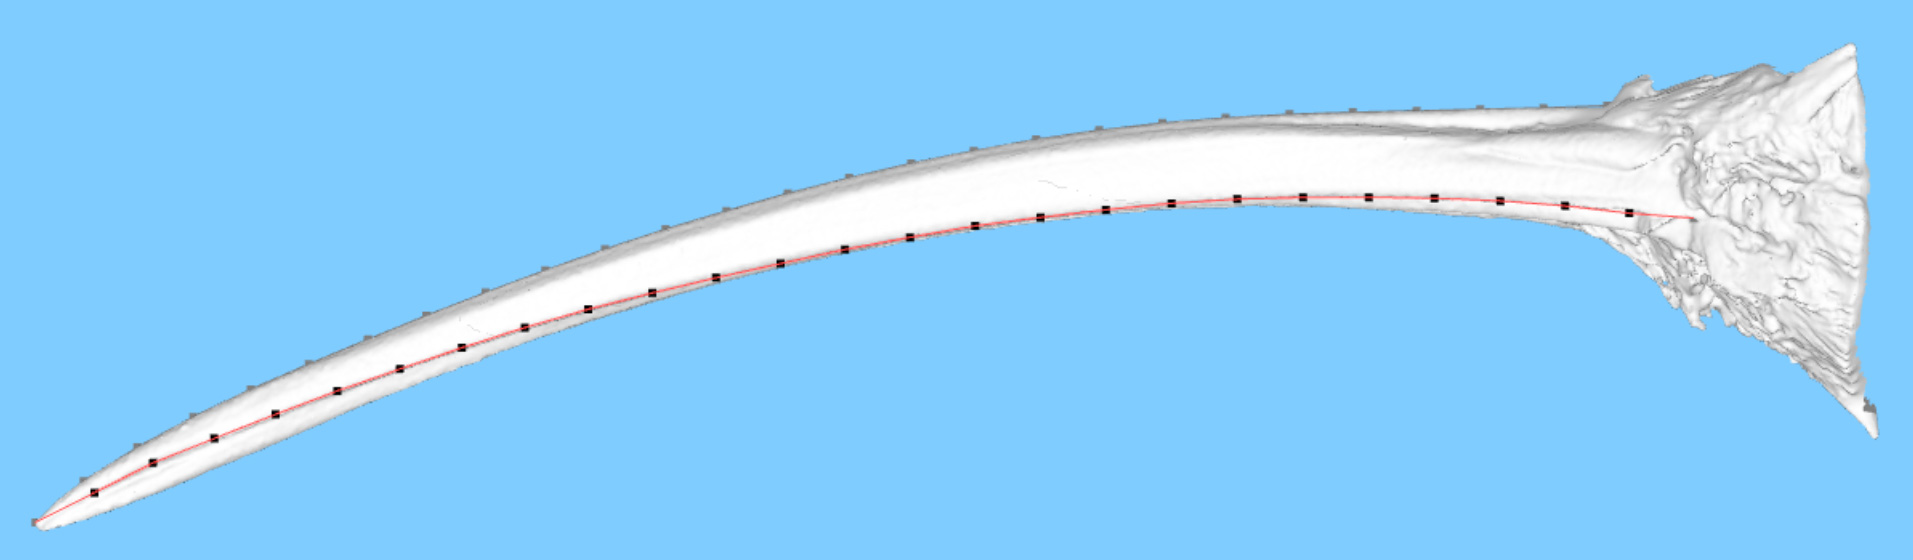
Hummingbirds
Hummingbirds, like this Great-billed Hermit (Phaethornis malaris), have bills that are long and thin for probing in to flowers. Often, the upper bill will wrap around the lower bill at the sides. The fact that the bills are so long and thin can make it difficult to work out where you are, and it can be tricky to rotate the models. If you take your time identifying where the edge goes before you start adding markers, then you should be OK. Don’t worry if you make a mistake, that’s what the “undo” button is for!
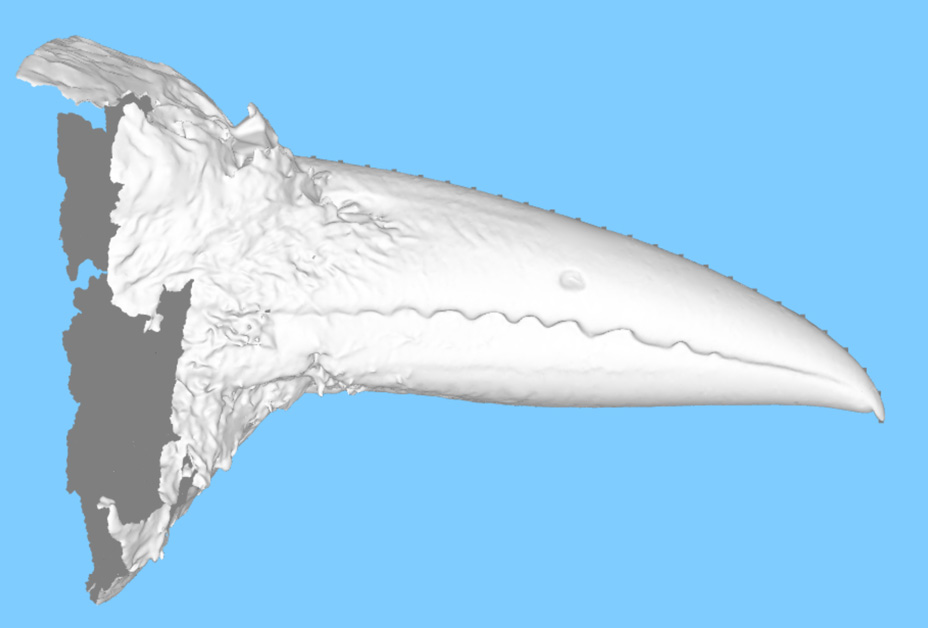
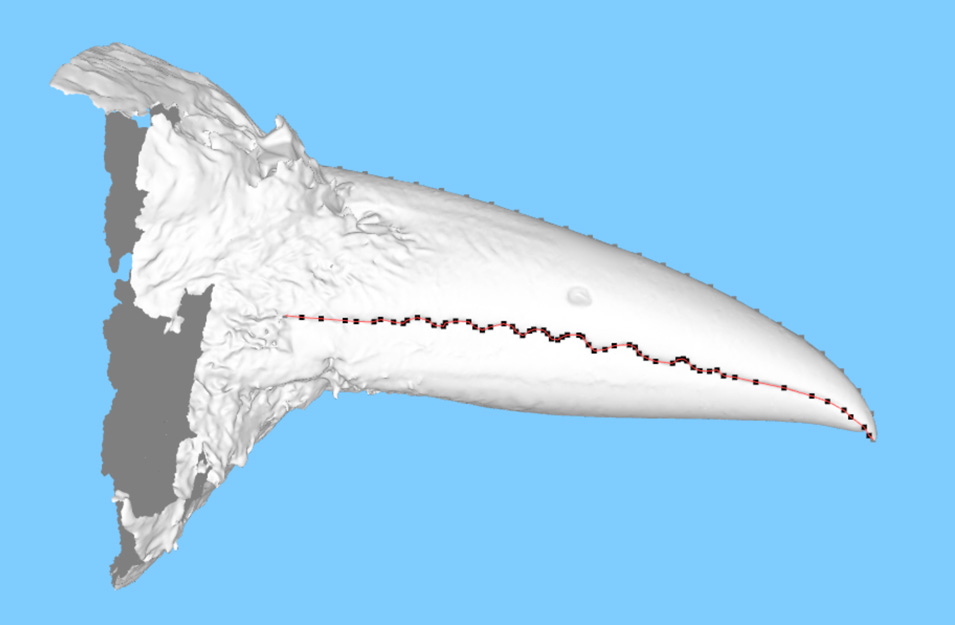
Serrated bills
Some birds, like this Rufous Motmot (Baryphthengus martii) have serrated edges to their bills. We’d like you to try and capture these features as well as you can when you place your points. The computer will then convert your points so that there are 25 new points spaced equally along the edge curve. This automatic step may result in some loss of detail, but the better your curve is, the better the automatic curve will be!