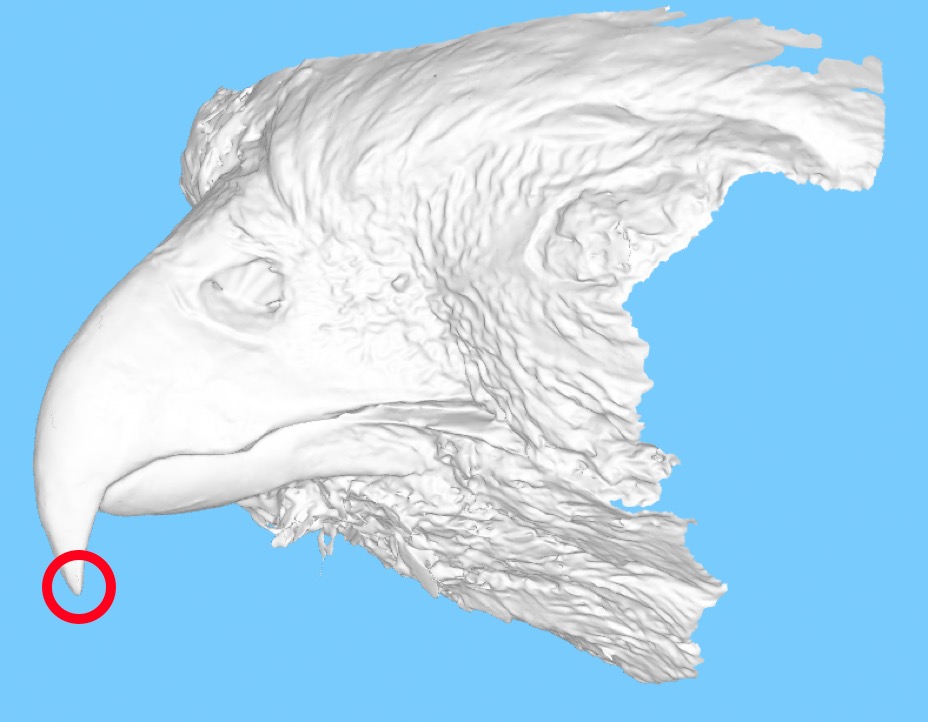
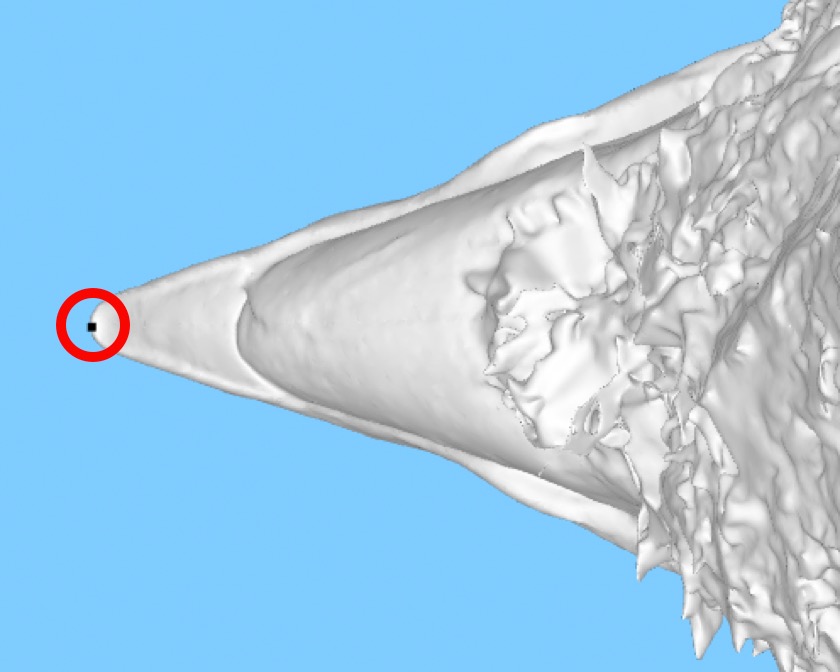
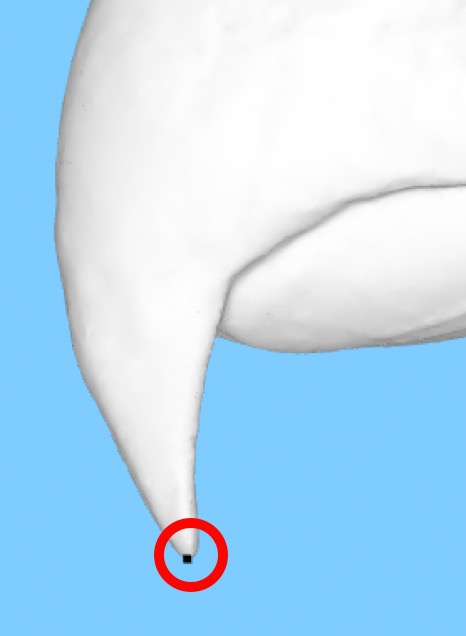
How to markup a bill
Point 1: Tip of the bill
This marker will be used to define the tip of the upper bill. This is usually the pointiest part of the bill, and is often easiest to find by looking at the bill from below.
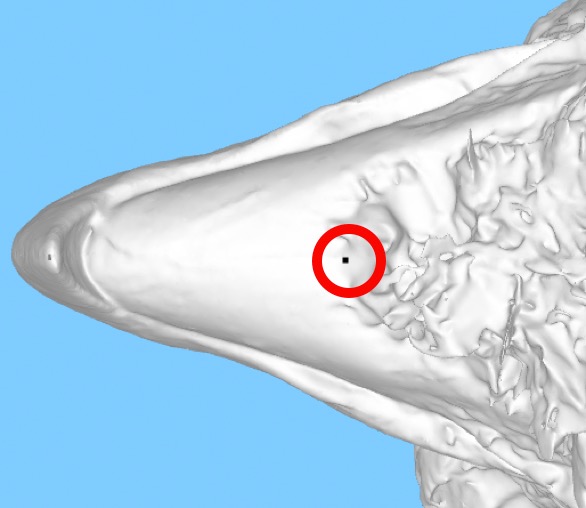
Point 2: Back of the lower bill on the bottom midline
This point is not used in the analysis, but we need it to help the computer tell where the centre of the bill should be. Choose a point on the lower bill that falls along the middle. A good place to pick is in the middle where the feathers meet the lower bill.

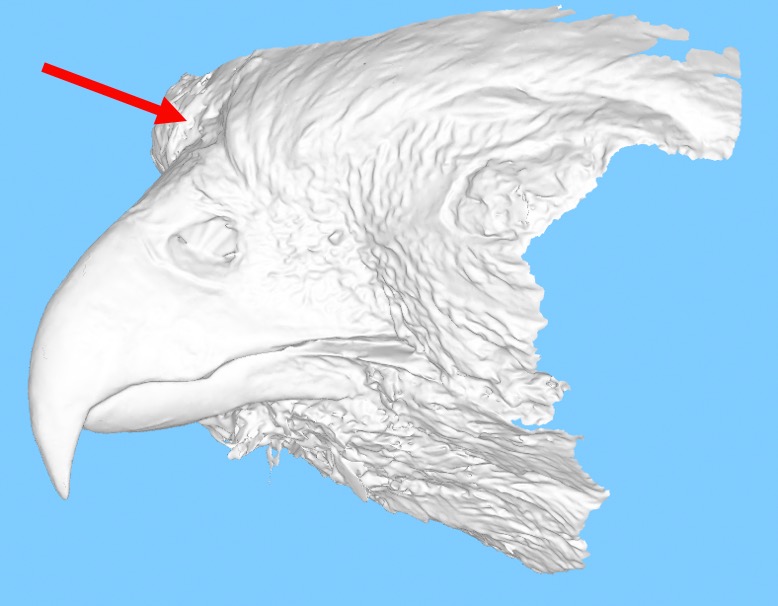
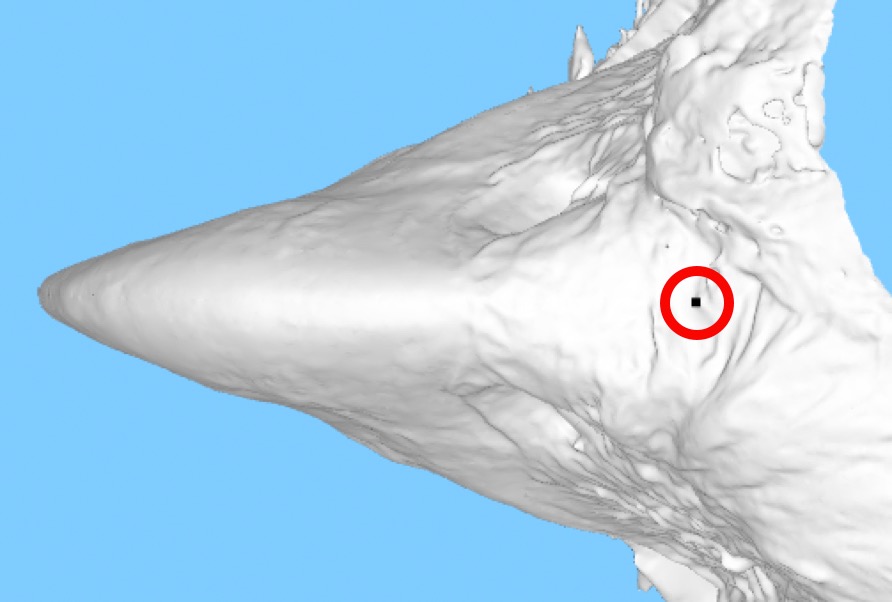
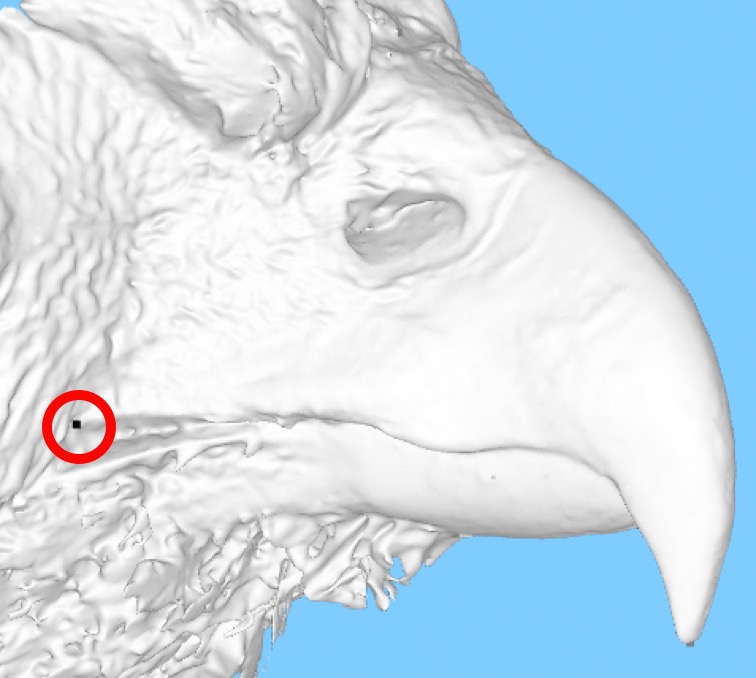
Point 3: Back of the upper bill on the top midline
This marker is used to define the top and back of the bill. Place the marker in the middle of the bill, just in front of where the feathers begin. Sometimes it can be a bit difficult to tell where this is on a scan, but the bill usually has a much smoother texture, whereas the feathers are much rougher. The feathers usually stick out more too, so you can use the change in the slope to help you.
Point 4: Back of the upper bill on the left edge
This marker is used to define the back of the left “cutting edge” of the upper bill. That’s the bird’s left, not yours! Again, aim for the place where the smooth part of the bill pinches out, and the feathers begin.
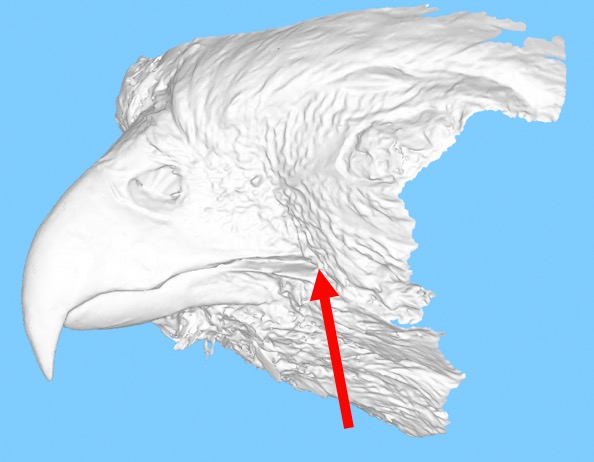
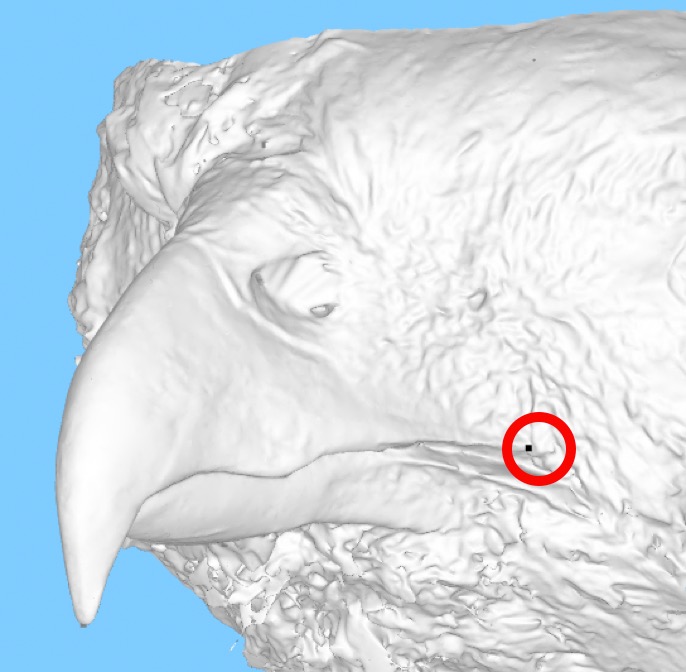

Point 5: Back of the upper bill on the right edge
This marker is used to define the back of the right “cutting edge” of the upper bill. That’s the bird’s right, not yours! Again, aim for the place where the smooth part of the bill pinches out, and the feathers begin.

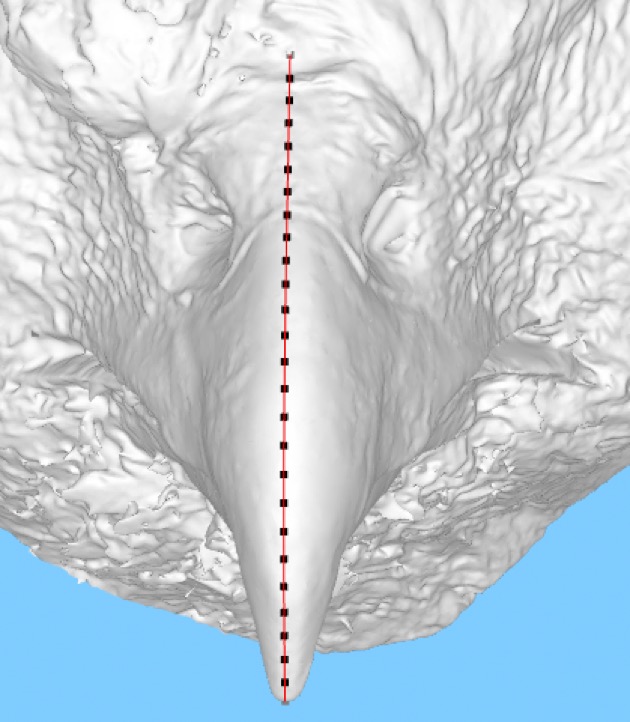
Midline
This one’s pretty easy! The computer will work out the midline of the bill for you, based on where you placed points 1, 2, and 3. We use these points to define how much the upper bill is curving.

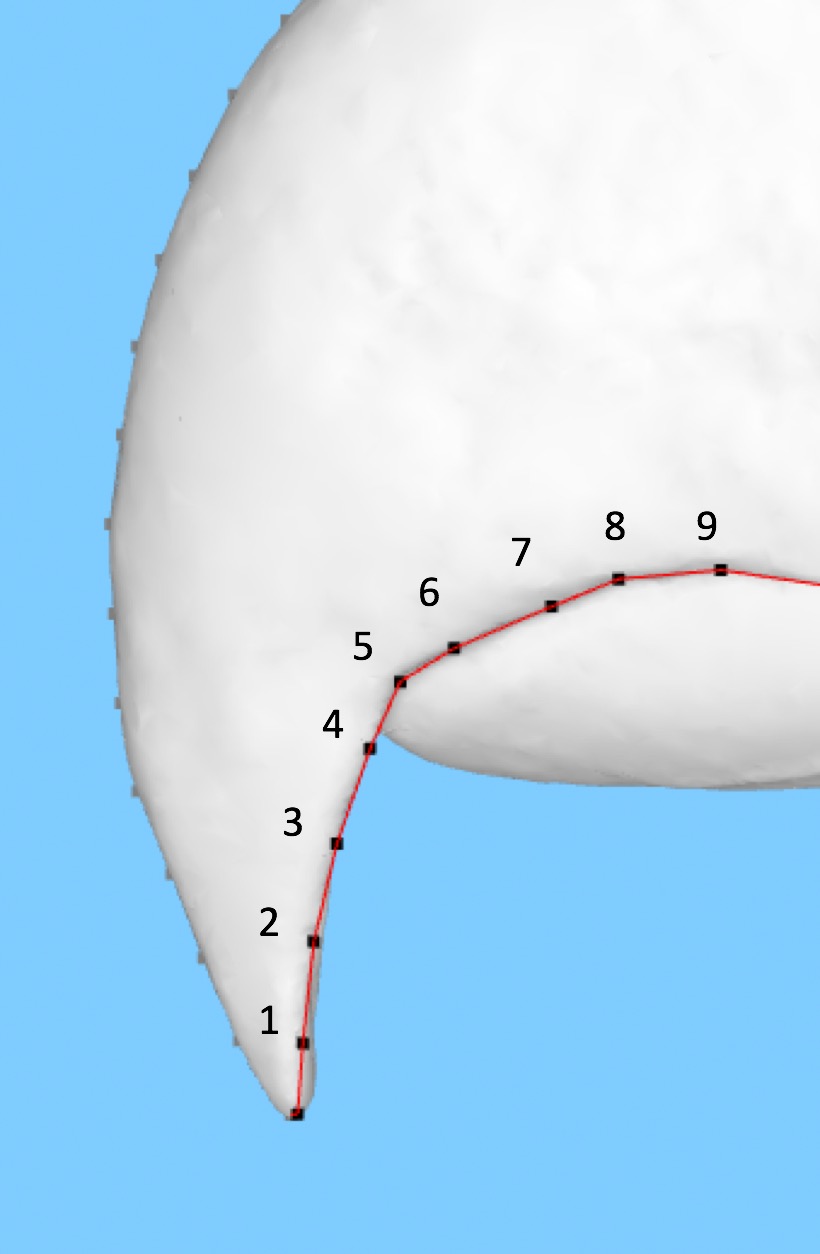
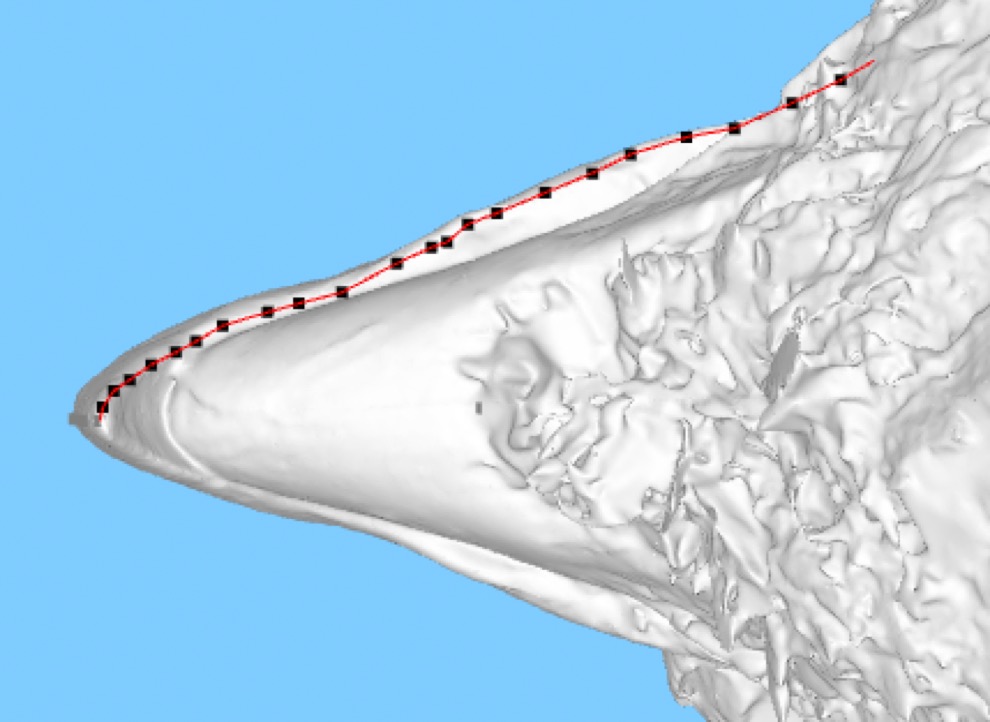
Upper bill left curve from front to back
Here, we’re trying to define the curve along the left cutting edge of the bill, between the bill tip (point 1) and the back (point 4). You’ve already told the computer where the bill tip is, so place your first point on the left edge, just behind it, then keep adding points until you’ve followed the curve all the way back to the feathers. There is no maximum on the number of points you can use, but you need to place at least 15 to make sure the curve is captured properly. More curved bills will generally need more points than straighter ones. When you’re finished, the computer will automatically spread the points out evenly along the curve you just defined.

Upper bill right curve from front to back
As with the left edge, here we’re trying to define the curve along the right cutting edge of the bill, between the bill tip (point 1) and the back (point 5). This is the same as what you’ve done before along the left edge, just on the other side of the bill.
